Water is so much fun to play with - and a great learning tool, too!! It can be a fun mess, though, so summertime is a great time to do it, if you're worried about getting your floors, tables, clothes wet! Just take it all outside!
You do not need a fancy water table (although there are some great ones out there!) or a great amount of water. I've done these activities with a small basin of water, in sinks, or in little blow-up baby pools in the yard. You can do it with one child or a few, just watch, as always, for safety around water!
Here are my Top 5 Water Play activities:
 1. Sink or Float: Gather up, with your child, a variety of objects that can get wet. They can be kitchen utensils, blocks, toys, fabric, sponges, .... anyything you have on hand! Your child can experiment with how these things interact with water ... Do they sink? Do they float? Do they expand and take on water? There are so many things your child can learn from this type of play, as well as having fun while doing it! Children will be observing, interacting, making connections - scientists at work!
 2. Measure Up: Make available some containers - save yogurt, milk, margarine containers - and some measuring cups or small pitchers. Anything that will hold and pour water will do. Let your children discover how to fill containers using other containers and encourage them to see differences in size - "Look, it took you two scoops with the yogurt container to fill the margarine tub!" Watch as they count and size containers, determining smallest and largest, less and more, and be sure to name those concepts for them as you go! Join in to model new activities, as needed, but let them be the ones making the discoveries :)
3. Water Cycling: Children are never too little to learn about the importance of conservation. Talk to them about how the water we have on our planet is so important to our lives. Show them how the water cycle works by setting up a tiny model, using clear plastic containers. Next time it rains, catch some rain in a pitcher or shallow plastic container. Pour some into a clear cup and mark the water level on the outside with a piece of tape or marker. Next, invert another clear cup over the top to make a seal. Place it in a window where you can observe it over time. Check back later to see, as the water heats from the sun, tiny water droplets forming on the top and eventually dropping like rain back to the bottom. Keep checking to see if the water level changes. After having some success with this, uncover the top and keep track of the water level, as it dries up. Lots of opportunity for discussion ... your child may want to record their findings via artwork, journal-style ... their first "lab reports"!!
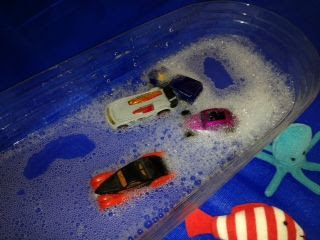
5. Wash Day!: Kids love water and kids love bubbles - and you love clean toys! Make everyone happy with wash day activities. Set up a basin with some warm, slightly soapy water - a little squirt of dish detergent goes a long way! Have a rinsing station - either a clear water basin to dunk in or some pitchers and a larger shallow container (like a baby pool) and a drying center. If you have access to a fence and clips, that would work, or spread out some beach towels or an old shower curtain to catch the sun. Then, let your kids have fun washing, soaping, rinsing and drying - cars, dolls, play equipment, etc. They will have a great time - of course, bubbles may be blown around, too, and they will most definitely get wet - and happy!
Have fun!
You do not need a fancy water table (although there are some great ones out there!) or a great amount of water. I've done these activities with a small basin of water, in sinks, or in little blow-up baby pools in the yard. You can do it with one child or a few, just watch, as always, for safety around water!
Here are my Top 5 Water Play activities:

3. Water Cycling: Children are never too little to learn about the importance of conservation. Talk to them about how the water we have on our planet is so important to our lives. Show them how the water cycle works by setting up a tiny model, using clear plastic containers. Next time it rains, catch some rain in a pitcher or shallow plastic container. Pour some into a clear cup and mark the water level on the outside with a piece of tape or marker. Next, invert another clear cup over the top to make a seal. Place it in a window where you can observe it over time. Check back later to see, as the water heats from the sun, tiny water droplets forming on the top and eventually dropping like rain back to the bottom. Keep checking to see if the water level changes. After having some success with this, uncover the top and keep track of the water level, as it dries up. Lots of opportunity for discussion ... your child may want to record their findings via artwork, journal-style ... their first "lab reports"!!
4. Freeze and Melt: Fill up some ice trays or small containers with water and place in the freezer. When frozen, they can be turned out into a basin alone to observe the melting process, or put into water - where they will melt faster! Your child may want to use some big spoons to capture and release ice pieces, or just fingers to feel the temperature and texture. (Have a bit of room temperature water available to dip chilly fingers in.) Introduce some small toys and see what your child will do with them. Try freezing small figures in ice and seeing how long it takes to get them free! Your child may find ways to speed up the melting process! Fun!
5. Wash Day!: Kids love water and kids love bubbles - and you love clean toys! Make everyone happy with wash day activities. Set up a basin with some warm, slightly soapy water - a little squirt of dish detergent goes a long way! Have a rinsing station - either a clear water basin to dunk in or some pitchers and a larger shallow container (like a baby pool) and a drying center. If you have access to a fence and clips, that would work, or spread out some beach towels or an old shower curtain to catch the sun. Then, let your kids have fun washing, soaping, rinsing and drying - cars, dolls, play equipment, etc. They will have a great time - of course, bubbles may be blown around, too, and they will most definitely get wet - and happy!
Have fun!


