Showing posts with label gross motor skills. Show all posts

Saturday, January 6, 2018

Host Your Own Kiddo Olympics!

With the Winter Olympics coming up, there are so many fun ideas to play with that are Olympics-related and that will inspire excitement in your children!! Check out the live feed from www.nbcolympics.com or get lots of info at www.olympic.orgGoogle "Olympics" for more sites ...

Even though your kiddos aren't in the real Olympics (yet!), you can still do some training and competition! It is so important for children to have lots of exercise and physical movement - get out there and make it happen! It's easy to put together a simple program of activities using items you may already have around the house or classroom. If you do a few games or exercises each day, you can stretch it out over a few days or a week - culminating in a Closing Ceremony of your choice!


Generate some interest in a "Kids Olympics" by asking your children what they already know about winter sports ... skiing, skating, hockey, snowboarding, etc. Build the conversation by sharing your own experiences with athletics or your memories of Olympic athletes (or other sports figures!). There are lots of clips available on Google, YouTube, etc. to help explain the concept of the Games to children - just be careful to preview all clips before sharing - titles do not always reflect content. Talk to your children about competing and taking pride in their accomplishments - stress the value of trying and training, and the concepts of winning and participating.

A trip to the great outdoors when there is snow on the ground or to the ice rink is a great option for those who are able. Any time you can fit in a little large motor activity, go for it! If you are looking to do a competition indoors or in a more controlled way, you can come up with your own games. Try putting together "Our Own Olympics" with fun and games for all! 

Here are some game suggestions that you can do at home or school with little preparation: 
(A punch card or sticker card is an easy way to keep it organized!)

Sock Skating: shoes off on a smooth surface and you can practice some twirls, figure eights or, in a big enough space, some speed skating! Great for the large motor stretching!

Balance Board: using a piece of 2x4 or some long wooden blocks, practice walking on the thin raised (just the depth of the blocks) platform to work on balance!

Olympic Ring Toss: use bean bags and some hula hoops or a piece of rope made into a circle to do some tossing for depth perception and eye-hand coordination.

Precision Racing: Plastic egg on a big spoon - find a friend and race up and down the room or outside - great exercise for coordination, balance and it's fun!

Tumbling - on a soft surface with supervision, rolling races (roll like a rolling pin!) are action-packed. (Or down a snow-covered hill!)

Keep going ...  inventing games is half the fun! Perhaps your athletes have some ideas, too!

For a related art project, trace children's hands on flame-colored tissue paper - red, orange, yellow - one set of each if you can! Wrap a paper roll with black paper or have them paint them black and then attach the hands to the top - now you have an Olympic torch!


Make some hand-made medals together, going over the five colors of the rings - every country participating, at the time the logo was developed, had at least one of these colors in its flag! The five rings represent the five continents (North and South America were considered together at the time, Europe, Africa, Asia and "Oceania") of the world - and the fact that they are all joined together for "unity" - kids understand that concept!


Crafts can be simple:

For olympic rings, you'll need paper, paint (representing each of the five colors) and small paper cups! Hold the cups upside down, dip in paint and print circles galore!


I like to finish off with individual photos of my Olympic athletes, standing in front of the flag, wearing their hard-earned medals - and huge smiles! They make a great keepsake - and, who knows, maybe it will be part of their own Olympic profile someday! :)


As always - have FUN with it!

(note: Parts of this post are taken or adapted from my previous posts on the Olympics.)

Tuesday, July 19, 2016

Moving and Shaking Outdoors

There is nothing that can take the place of good old-fashioned outdoor play!

Rolling in the grass, climbing in trees or on playground equipment, and balancing on low walls or curbs all help your children develop the balance and gross motor skills they need for so many daily activities. Movement of the body and development of those core muscles may even help with their stamina and ability to focus and attend to tasks. These actions can also give little ones the sensory experiences that they don't get enough of in today's plugged-in world :)

Allow your child to make choices and try things that push them a little out of your comfort zone. Explore new playgrounds or see opportunities for exploration in a daily walk through the neighborhood. Outdoor or active play gives your children areas to try out new skills. Choose a safe environment, but with room to explore and move freely, and let your children set the tone.

Let your kiddos strengthen their growing muscles by pulling up or hanging upside down on playground equipment or sturdy tree limbs. Let them try out some hanging ladder-style bars - even making it a little way across will seem like a great accomplishment ... and then help them set goals for how they will improve through the summer :) Balance on a curb, or sidewalk edging.

Even though your children may be great walkers or even runners, crawling is still great exercise for your little ones. Group or single play obstacle courses are fun to set up, change up, and explore! Crawl around or under some backyard chairs or tables, hop over some garden stones, walk along some patio blocks ... you get the picture!

Remember rolling down grassy hills? So much fun! Make sure your kiddos get to experience barrel rolling down hills and across grassy areas - it is good for their bodies to exercise and get the stimulation that occurs naturally through these simple activities.

When you're all worn out, lie out on some cool grass, look through some leafy trees - there are lots of moments that can be great for conversation with your little ones - unplugged, relaxed, and open ended :)

Have fun!


Friday, July 24, 2015

Social Skills: Play!

Have fun in the summer - and, use the time to make sure you are exposing your child to new, playful social situations, to prepare the way for school :)

Make a trip to a park or community pool ... or, just take a walk down the street to meet other children  for your child to spend some unstructured playtime with. Playgroups or play dates are also a good option, as long as there is plenty of free interaction between children. To get started, pull out some water toys or set up sand construction tools ... all you really need is some plastic cups and shells or pebbles. Then, let your child imagine what to do with things they find - and share with a new friend! Playtime is their "lab" for discovering what works and doesn't work when forming friendships and working together on projects.


Getting in some non-screen, active time will help your child develop skills such as decision making, planning, sharing - all skills needed in a group setting, like school. The ability to make choices on their own, and to share toys or play cooperatively, are developed over time, in natural play settings. Little ones develop these skills through trial and error, so let them explore :)

In today's world, there are many choices for children's activities that are technology-based, which do not always involve daily interaction with peers. While these may be a favorite part of your child's day, they can detract from building social skills, if used too often. Interactive play time also helps develop your child's speech and language skills, as well as their dexterity in handling objects and art materials.

The more variety your child is exposed to, both through experiences and with handling different toys and art materials, the more they will continue to grow! Keep it simple - there are so many easy ways to inject a little group fun - sidewalk chalk, bubbles, rock and popsicle stick building projects ...

Have fun!

Thursday, April 4, 2013

Spring into Action!

As the weather starts to get a little warmer, it's a great time to reevaluate your daily routine with your children! Use this time of year to jumpstart a daily movement plan that will get you ready for summer play. Slipping in some exercise, some walking, balancing, throwing, catching - it will all help your child's overall development! After a long winter of sitting inside, it's just what we all need!

Start by inserting some basics, such as running in place or jumping jacks, in between everyday tasks. It will rev up your energy level and boost your mood! Have a catch with a squishy ball or stuffed toy! Visit a playground or plan a playdate that is a no video/no game time for action :) Pull out some chalk and make some hopscotch or maze patterns to use for more fun!

Find some pockets of time where you can get in a daily walk - even if it's only for a few minutes. While you're walking, you can cover a whole day's worth of early childhood curriculum.
Children are fascinated by the tiniest things in nature ... a bud opening on a tree, an ant crawling on the sidewalk, a ladybug on a leaf ... use this time to help your child connect with nature! (science)  Work on counting as you cover the distance down the sidewalk! (math) Practice songs and clapping to different patterns while you walk - find objects that begin with each letter of the alphabet! (literacy)

And, best of all .... have fun!

Monday, July 23, 2012

Summer Olympics Fun!


There are so many fun ideas to play with that are Olympics-related and that will inspire excitement in your children!!

Start with checking out all the internet action already going on to get them aquainted with what sports and athletes they might be interested in. Check out the live feed from www.nbcolympics.com or get lots of info at www.olympic.org ! Google "Olympics" for more sites ...

Then ... do some training and competition! It is so important for children to have lots of exercise and physical movement - get out there and make it happen! It's easy to put together a simple program of activities using items you may already have around the house or classroom.

See what you can come up with ... when we did the Winter Olympics, we set up a card for each  "competitor," with different stations for "events" like sock skating and olympic ring toss (hula hoops and bean bags!). If you do a few games or exercises each day, you can stretch it out over a few days or a week - culminating in a Closing Ceremony of your choice!

Crafts can be simple:

For olympic rings, you'll need paper, paint (representing each of the five colors) and small paper cups! Hold the cups upside down, dip in paint and print circles galore!


For a related art project, make Olympic torches! Trace children's hands on flame-colored tissue paper - red, orange, yellow - one set of each if you can! Wrap a paper roll with black paper or have them paint them black and then attach the hands to the top - now you have Olympic torches!


Make some hand-made medals together, going over the five colors of the rings - every country participating, at the time the logo was developed, had at least one of these colors in its flag! The five rings represent the five continents (North and South America were considered together at the time, Europe, Africa, Asia and "Oceania") of the world - and the fact that they are all joined together for "unity" - kids understand that concept!


I like to finish off with individual photos of my Olympic athletes, standing in front of a flag, wearing their hard-earned medals - and huge smiles! They make a great keepsake - and, who knows, maybe it will be part of their own Olympic profile someday! :)

(Parts of this post are adapted from previous posts on the Olympics - I wanted to get it all together :)

Have fun!!

Wednesday, November 23, 2011

Turkey Time!

Happy Thanksgiving!

Here's a short list of things to do with your kids:

1. Give them jobs to do to help prepare for the holiday: teach responsibility through small chores and jobs. Setting the table, counting out silverware, greeting guests and taking coats are all small tasks that will help your child feel included in the festivities.

2. Make a centerpiece! Take some natural items that your child can scavenge from the great outdoors - pine cones, berries, small rocks - and add to a large vase or glass container. Set in a large pillar candle or some votives, making sure that nothing is near the flame. Your child will be thrilled to help!

3. Design some placecards! Grab some card stock or heavy paper and some art materials and have your children practice writing names! Give them a list of who will be gathering and let them design some stand-up cards to place around the table. Stickers or stamps and ink pads would be cool, too!

4. Play some old-fashioned games when the feasting is over! Simple games were played even by the Pilgrims - rolling hoops, tic-tac-toe, checkers - spend some time on something that's not plugged in and have a great conversation with your child!

5. Go for a walk! After your fantastic feast, while you're "making room" for dessert, get out and go for a walk around the block or down the street!  Get some exercise for the whole family :)

Have fun!

Thursday, August 25, 2011

Back To School!

September means back to school at our house - some areas are back already - so it's time to put away the summer lifestyle and get ready for school days! Here are some things you can do to help your child get ready:

1. Start adjusting bedtimes/wake-up times if they've changed a lot in the summer holidays. Small shifts over time work better than ... WAKE UP!! out of the blue 😉

2. Think about the volume of communication that will be coming home shortly and come up with a way to handle it quickly and efficiently ... a binder, basket, magnet clips ... whatever you think will keep things organized and at your fingertips. Try to return papers as they come home to avoid build-up and stress!

3. Check your school's website for calendars, supply lists, reading lists - many schools are going paperless and there may be useful information posted already! Any information you have ahead of time will make the transition into school easier.

4. Work out a morning routine, complete with a schedule and expectations, and get your child involved in setting it up - the best way to avoid those early morning melt-downs is to have a clear picture of what needs to happen and then, to follow through - start the year out as you want it to continue.

5. Come up with a short list of lunches/snacks that will work for your child and try to keep options stocked and available as your fall-back when you're not feeling creative and you don't have a plan - keep it simple!

6. If you haven't seen school friends all summer, set up a lunch or play date with a friend or two to ease the way back into school - comfortable children always do better in school :)

7. If you've slacked off reading and writing during the summer, begin reintroducing short periods when your child can spend some time engaging in these activities and reconnecting with the elements of literacy.

8. Chances are that your children will be asked to draw and/or write about their summer when they start school - generate some ideas through discussion, so they can feel confident about their first assignments. Have them reflect on photos or play "remember when..." to get them started.

9. Stamina can be an issue after a long, lazy summer - get moving and walk, bike, run with your child to increase their (and your!) stamina for those longer periods of time when they will need to focus.
* This would be a great time to cut back on the screen time :)

10. Positive statements about school, friends, teachers, experiences will help your child look forward to the days ahead - focus on the positive instead of dwelling on the end of vacation and you will be happy when your child is happy, too!

Enjoy! Have fun!

Wednesday, July 13, 2011

Summer Camp: Pirate Play!

Playing Pirates is always a BIG hit - with boys and girls! Gather some props to make a pretend pirate ship - a large box to decorate would be great, but just arranging some chairs together and tying on some black streamers or fabric to connect them will give your children a place to gather! Add a paper-plate ship's wheel  and they will be set to go!

Get in a bit of geography by having a globe on hand and spinning it to choose where you are setting sail for. Have the children find "home" on the globe as well! If there's no globe available, a large map will do :)

Every pirate needs a spyglass, so each child should start out with a paper towel tube and decorate accordingly - use markers or stickers to make them really cool! There are lots of clip-art pieces on Google images to try out - pick a few and assemble!

If you have any eyepatches lying around, or other pirate regalia, put them out in a dress-up bin - try some all-purpose vests turned inside out and some old shirts cut with ragged edges to make pirate gear! A sash cut from red and white striped fabric or an old scarf pulls the whole look together!


For more crafts, supply a key with simple mapping symbols and paper and markers for the children to make some maps - don't forget a big X to mark the spot where the treasure is!  If you're looking for more fine motor practice, you can find free pirate coloring sheets at several sites on the internet, as well!

Before all the fun begins, come up with a "treasure" to be split between the pirates - beaded necklaces from the party store and "gold" coins work well - and hide it all in a special container somewhere. Then, devise some clues that will guide the group from place to place, each time to find the next clue until the end of the hunt! Here are some to get you started:


Treasure Hunt!
Cut these clues apart and hide them as directed – or make up your own!


Under the fence where the squirrels run                        (have this ready to start the action!)
Look for clue #1!


Find a toy that’s the color blue – that’s                                   (hide this under a fence!)
Where you’ll find clue #2


Look around the base of the big tree                                       (hide this under or near a blue toy!)
If you’re looking for clue #3


Beside a window or a door,                                                  (hide at the base of a tree!)
You will find Clue #4


Look under a rock or two                                                     (hide beside a window or door)
To find the fifth and final clue!


This clue will send you around the lot                                         (hide under a rock)
Until you find where X marks the spot!

 (attach a rolled up REAL treasure map to the last clue -  ready to point out where you’ve hidden your “treasure"!)
 

If your treasure includes some gold coins, get in a little fun "arrrr"ithmetic - counting and adding up sums!

For snacks, try some "treasure" goldfish crackers in silver cupcake papers or some pretzel logs and fruit roll-ups cut up to form into a pirate ship - fun!

Books to read with your little pirates:
"Shiver Me Letters: A Pirate ABC" by June Sobel
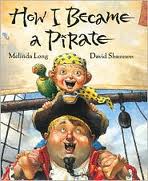
"How I Became A Pirate" by Melinda Long
"The Night Pirates" by Peter Harris
"Tough Boris" by Mem Fox
"Grandma and the Pirates" by Phoebe Gilman
"What's Inside a Pirate Ship"

Have a great time!

Thursday, July 7, 2011

Summer Camp: Pretend Camping!

When the summer starts to get "old" for your kids, here's a do-it-yourself fun idea: hold your own summer camp days, right at home!

All you need is a little pre-planning and some imagination - start now, while the fun is still fresh and plan ahead for later in the summer!

In the past, I've held camp during August (basically crafts, games, stories and snacks!) - parents and children were looking for things to do by that time of the summer! Plan a morning full of activities - you could even switch off with another parent or two to free up some me-time!! It's always more fun with a few:)

I'll start you off  with ideas for a theme that worked well for me - and follow up with more themes in more posts - so, check back!

Camp-In Day

Set up a small tent outdoors (or indoors!) and gather up some quilts and cushions. Make sure you have the fixings for a pretend camp-fire - I found a little aluminum baking pan that we adorned with yellow, orange and red tissue paper flames - some rocks or wooden blocks placed in a circle with some sticks in the middle would do nicely, too!


Meet around the "campfire" to get started - talk about camping and outdoor fun - then go on a little "hike" through your yard, neighborhood or a near-by park. Have a small plastic container along for a sensory tub to be filled with rocks, pinecones, leaves, small sticks, etc.

When you are finished, have a basket of books related to camping available :)  There is a Berenstain Bears book - "Go To Camp" and a great Kevin Henkes story "Bailey Goes Camping" to get you started! While some are checking out books, have the other children rotate through different activities, just like in school, so each child gets to try everything!

For crafts, have available some TP rolls to make into binoculars for viewing nature. Use paint or markers to color or have stickers available to decorate. At another spot, have some sturdy paper and glue to turn your nature finds into a cool art collage! Get a little letter/sound practice in by trying to label the found items! For pretend play, gather some plastic plates and picnic items and they will do the rest!

For a snack, try some trail mix (cereal mixed with raisins and nuts, if permitted) OR assemble your own kid-s'mores, using graham crackers with layers of chocolate cake frosting and marshmallow cream spread on top! Have water or juice available to stay hydrated!

Knowing how kids love "souvenirs," you could also find some tiny compasses and bandannas at a party store or on-line catalog! When you're ready, you can close the "camp" by singing some favorite songs around the fire! Have fun!

Monday, May 9, 2011

Bug Party: Early Childhood Exploration!

Plan a "party" to celebrate and explore BUGS! Gather a few things together to make your children feel like explorers - we chose safari hats and bandannas from the party store, a simple bug collecting case (ours was from a craft store, but you could make one from a recyclable container) and a magnifying glass. Then, round up your bug-hunting crew (we did it for a small birthday party!) and get ready for an adventure. Plan on visiting a nearby park or garden, and plan your route with a rough map - map-makers welcome! (On our walk with a few three and four-year-olds, we decided to make a work-crew guidance device (!) using a length of rope and making a big knot for each child to hold onto - the leader held one end of the rope and a spotter took up the rear! We told them we all had to help carry the rope in case we needed it!)

Once you arrive at your destination, have an adult or child model for the other children how to move  rocks without hurting bugs, how to slow down and look carefully, and how to stay very still while "hunting" - then, set off on your own or in pairs, once a perimeter has been established! Cries of "check this out!" and "quick, look at this!" will ensue as everyone has fun finding a variety of insects.

Make sure to have a digital camera on hand to record some of your finds for review later! Have some books about bugs along to read or another activity for when you start to slow down ... we sat down and did some body art, coloring ants and ladybugs on forearms or cheeks with face-painting crayons.

Later, prepare some special treats with your "buggy" crowd:

Ants on a Log
Use sections of celery sticks, spread on cream cheese and add a row of raisins for ants. I've also seen this done with variations using pretzel logs, peanut butter and craisins :) Watch your food allergies!

Dirt Dessert
Mix together one large vanilla pudding mix and two cups of milk. Add 1/2 cup of powdered sugar and 8 oz. of softened cream cheese - mix until blended. Stir in 8 oz. of Cool-Whip type topping. If you do this with the kids, make sure to count and measure along the way - math!

In another bowl, combine 1 1/2 lb. package of crushed Oreo cookie crumbs and 1/2 stick of melted butter to look like dirt. Alternate layers in a cups or a bowl, ending with crumbs on top! Add some gummy worms for fun and refrigerate!

Yum!

Saturday, May 7, 2011

In the Kiddie Pool for Early Learning Fun!

An inflatable baby pool is a great tool to have on hand – I like to keep a small one around for all sorts of fun- no water necessary! A 3-ft diameter size is great for a small play center, while larger is better for a library or group “sit-in” set-up!


Swim into Reading
Fill your inflated pool with some comfy cushions – I’ve thrown in a few beach towels, too, that they can roll up or spread out. Add a stack, or a beach bag, of books, such as ocean and/or fish books!  Plan with your children how many can comfortably fit in and generate rules for use.  Chances are you’ll find lots of reading going on!

Sandy Beach
This is a great way to have some sand play, even if you don’t want or don’t have a whole sandbox set up! Fill partially with some sand – you don’t need a lot! – add some shovels and maybe some shells or plastic sand toys. Watch out for sharp edges that could puncture the pool or hurt a child. You can make it a “reach in to play” center or a “get in to play” center, depending on the size of the pool and your clean-up requirements .
Imagination Play Prop
Children are resourceful in planning out how to use props for imaginary play. A small pool might be an animal pen, a baby crib, a comfy bed, even – a pool! I’ve seen one used as a stage, a lake, a fish pond – even a Jacuzzi!
Fishing Hole
Make some fishing rods from sticks you find outdoors or from some dowels (easy to find at a hardware store). Attach a length of heavy string or yarn and add a magnet to the end.  Whatever you are fishing for should have a paper clip, or something metal attached to it, to make it “catchable”! You can catch fish, octopi, and whales made out of craft foam - great hand-eye coordination practice!
Fish for Learning
Take your fishing to another level and make letter cards, number cards, matching cards – and plan games around them! If you already have cards with magnets on them, just change the fishing pole, so it has a big metal clip – it works either way! Practice letter and number recognition, do simple addition when you catch two cards – the options are endless! Colors, shapes, sight words, beginning sounds … "Look, what letter did you catch? Hmmm, what sound does that make?..." or "Find and catch a yellow fish! Now catch a red fish!"
Games
Practice throwing/tossing into the pool to get some exercise and hone throwing skills – bean bags, beach balls or other small balls would be fun to try! Try from different distances with different things, see how things fall depending on their weight and distance – have your children guess and then experiment!
Have fun!

Friday, May 6, 2011

We Are Scientists: Float Your Boat!

Where I live, there are sidewalks and curbs lining the streets, making a great channel for water to float or race a boat on a particularly rainy day! If you have somewhere to float a boat, gather some materials together and make one! To make a "boat", all you need is a small piece of wood, like a piece left over from a house project or lightweight shims that you can find at a hardware store. If you don’t have access to wood, a container that is shallow with a flat bottom, such as a small tray from a frozen meal or a plastic bowl or lid would work fine! Look through your recyclables and get inspired :)
Whatever materials you decide to use, put together an “activity box,” including paint, stickers, foil, tape, cardboard and anything else you think might work! If you want to, include natural materials like small sticks or large leaves or pods for interest. Let the children create, going over some basic sink and float information while you “play!” (I needed some sandpaper to sand my wood a little, to avoid splinters! Then, markers or paint and a few stickers - and my boat was ready to try out!)

Have a larger shallow container ready with an inch or two of water to test the boats’ seaworthiness periodically! Sticky tape, such as the clear packing type, can seal areas that might not be otherwise waterproof – and, remember - sometimes, the simplest designs are the best at floating! (We found that a plastic lid from a food container made a great raft, like those in a water park - we imagined riding down the "river" in that!)

When you are ready, make sure there are no traffic hazards for your children, and get out in the rain! You might want to try to race boats made of different materials or try boats on different streets that have more or less incline (see if they go faster or slower!)  Brainstorm to come up with ideas that will prove/disprove different theories – scientists in the making!
Try adding some ballast to your boats and see what happens! We added plastic bags of coins and washers – maybe you have a favorite toy figure who would like to go for a ride?
Have fun!

Monday, May 2, 2011

Go On A Bear Hunt!

It is always fun to read and get involved in a story with children - sometimes a favorite story is read over and over again! Remember stories where the children got so involved, they were chiming in on parts? While you are reading and re-reading, you can be sneaking in valuable literacy lessons, too, that just seem like good fun!

A favorite book to read and act out is "We're Going On A Bear Hunt!" by Michael Rosen, illustrated by Helen Oxenbury. In this book, there are lots of repeating lines, fun words and descriptive language - draw your child's attention to the sounds that each section of the "hunt" brings and encourage them to recall and order the events - great exercise for attention to detail!

Take a good look at the illustrations, alternating between black and white drawings and vivid color! For an animated version of the book, check YouTube - there are also other interesting videos, including the author acting out the story.

To act out the story yourselves, brainstorm with the children about the sounds that come up in the story ... and how you might recreate those sounds! Try to find things around the house that would make all the various sounds... "Hmmm, this part says "swishy, swashy".....what do we have that could make that sound?" Gather together some home-made sound effects or instruments that you could use to act out the story.

Make up simple symbols for the different scenes in the story and make posters to set on the floor and take a  walk - a grassy field, some mud, etc. - while acting out the story. Play "what-comes-next" and make sure you backtrack at the end!

For an art extension (and social studies!), make a map! Use simple symbols again or cut-outs to represent the areas that the family goes through and have the children lay it out in a map form! Use lines and arrows to show how the group should progress according to the story - maps are fun to make! Have a child describe the map to you and sequence the events of the story!

Have a good time reading!

Wednesday, April 6, 2011

Play and Learn with Plastic Easter Eggs!

Here you go - Ten Things To Do With Plastic Eggs!!
Before, during and after Easter, try these fun activities with plastic eggs you may have around the house! 
1.   Use for “anytime” egg hunts! Fill with seasonal stickers or pieces of a craft to be done - extend your hunt by having each child find one of each color, or plant personalized eggs  for each child to reinforce name recognition! If able, try one egg per letter and have them find and make their names :)

2.   Use eggs as a coin counting game! Put different amounts of coins in a few eggs and place in a basket on the counter. “Change” it up each time you play, pick an egg and get in some coin counting practice with your child while you’re waiting for dinner to finish cooking!

3.   Use eggs  to make patterns!  Open the eggs into halves so they will stand on open ends – use two or three colors to lay out in two- and three-part extended patterns – great practice :)


4.   Letter matching! Try matching upper to lower case – use a permanent marker to write uppercase letters on one half and lowercase on the other – mix up and then match up! Use multiples of colors to make it more challenging!

5.   Self-checking addition eggs!  Program each half on the outside with a number of dots, stars, etc. and write the sum on the inside (use one of each color to avoid mix-ups) – have your child count them up and then open up to check the answer!


6.   Use for games to make a rainy day fun! (Or a sunny one!) Place eggs on spoons and have some races ... if you drop one – no problem!


7.   Try another race – each child gets an egg and two or more children can race by pushing eggs with their noses on the floor – carefully!


8.   Like the old pass-the-orange game, tuck an egg under your chin and pass to a partner without dropping – this takes skill :)


9.   Use eggs in a container of sand for a dinosaur dig! Put small plastic dinosaurs in modeling clay and place in eggs. Bury in the sand and dig up “fossils”!


10. Use to plant seeds and grow small seedlings before planting outside! Open the eggs up, place in an egg tray or other container to stand them up, fill part way with dirt and add seeds … a little water and a sunny spot and you’ll be all set!

Have fun!

Saturday, April 2, 2011

Shape-ing Up!!

Circles, squares, triangles … there are so many fun projects and games related to shapes – to help your child learn and remember them all!

Play shape “I Spy” to get started – make sure you model a few times how to choose the shape you are highlighting … “I spy, with my little eye, something that is round like a circle ….” Even better, have another adult or older child model the thought process of finding the answer, speaking out loud, guiding your young child through the process. "Hmmm...It can't be the refrigerator - that's not a circle. But, I see a clock that is a circle, maybe that's it." When your child is ready, he/she can jump in! Making an "I-Spy" telescope, decorated with lots of shapes makes it even more fun to search!
Speaking of jumping in, kids LOVE to make shapes with their own bodies! Gather a group of friends and stand facing in, making a circle. An adult can stand on a stepstool and photograph the “shape!” Then, try three friends making a triangle and four making a square – have the children work out how many sides/people are needed for each shape. Photograph each if you’re able – they’re FUN to look at!

If you're doing this with a classroom of kids, divide them into groups of four or five and have them problem-solve - tell them everyone in their groups must be included in one or two shapes!


For an art project, pull together some scraps of construction paper and trace varied shapes for cutting practice. Then, have children choose a few shapes to glue to make a shape picture! Have them first create with no glue, manipulating the shapes into structures, vehicles, people, etc. Then, when they've had some fun with that, they can choose what "picture" they want to make and what shapes are needed. This is great for planning skills, and for practice following directions! Glue the shapes onto larger construction paper and embellish the pictures with markers, crayons or whatever you want! Try practicing the letters in the name of the shape, too!

Use large shapes cut from some durable paper or cardboard to play the "Shape Hokey-Pokey" and add some details about each shape as you go. With one or two children, give them each a variety of shapes or, with a group, hand out shapes in no particular order. Then, standing in a circle, sing and follow the directions....

"Put your circle in, put your circle out, put your circle in and shake it all about...
A circle is a shape that goes round and round, that's what it's all about!
Put your square in, put your square out, put your square in and shake it all about...
A square has four sides that are all the same size, that's what it's all about!
Put your triangle in, put your triangle out, put your triangle in and shake it all about...
A triangle has three sides and three corners, too, that's what it's all about!"

Make up words for more shapes as you go along - and have fun!

Sunday, March 27, 2011

April Showers ...

Get ready for April showers by checking out all the spring weather changes: wind, clouds and rainy days!

Wind
Wind projects are fun - kids love to play with kites, pinwheeels and flags - and there are lots of projects you can do with them at home. If you have an opportunity to fly a real kite, go for it! If not, a paper kite with a streamer for a tail and craft sticks in a "t," for support, is fun to make! If you trace the shape of a diamond on larger construction paper, give your child practice cutting it out to make the body of the kite. Decorate with markers, paint or stickers (or all three!) and then assemble the rest to form your kite!

To see which way the wind is blowing, make a "wind wand" - use a paper towel roll that you have decorated with stickers, markers or even colored tape. Attach one end of ten to twelve inch party streamers or lengths of tissue paper to one end, leaving the other end of the streamers free. Then take your wand outside and hold it in the wind, and watch the streamers fly!

Clouds
When you're ready to start checking out clouds, try Google-ing "cloud shapes" - all sorts of websites will pop up with fun pictures of cloud shapes - make sure to preview them first before showing to children. There are also some great books to read with your child: "It Looked Like Spilt Milk" by Charles G. Shaw, "The Little Cloud" by Eric Carle and "The Cloud Book" by Tomie de Paola are just a few! Take some time to view the clouds yourselves - see what cool things you can see in the clouds!

Make cloud pictures with white chalk or white paint on blue "sky" paper - then you can fill in the area with some nice, puffy cotton balls ... pull and stretch them to make them look different, like cloud types look different! Some might be thin and stringy, while others might be full and fluffy! Have children dictate a word for "My cloud looks like a _______," to finish it off.

Sing a cloud song with your child - this one follows the tune of "Frere Jacques" .....


Rain
Rain pictures are fun to do: using powder tempera paint on large paper, have your child make a design with the powder. (If you can't find powdered paint, just thin out some finger paint or bottled tempera paint so the rain can splatter it.) Carefully place pictures outside in a drizzle of rain on a tarp or plastic sheet and let the rain do the rest! When the design looks just right, bring them inside, again very carefully, and let dry - you will have a masterpiece!

To celebrate the rain, make a mobile with a cloud on top and some falling raindrops, with fun silver glitter to make the raindrops shine! Super easy project to do: All you need is white card stock or cardboard for the cloud, some varied lengths of yarn and blue paper raindrops. Use a little glue or a few swipes with a glue stick and your  silver glitter will look great on the raindrops! Tape or glue together and hang from a doorway or hanging fixture.

Play a counting game with some hand-made raindrops! Use the same paper as you used for the mobile, but cut a big "puddle" out of the blue and "raindrops" out of the white paper. Trace the shapes you want and have your child practice cutting on or close to the lines, if able. Lay the puddle on the ground and take turns dropping raindrops - some will land in the puddle, some outside the puddle. If you do this in pairs, one child can drop the raindrops while the other counts and then reverse. Count how many are in, how many are out and decide which is more/less/the same.

Have your child finish the sentence, "When it rains, I ______" and draw a picture to go with it! Maybe there are several endings to this sentence, and you will have a book! Take the opportunity to allow your child to point out or form some of the letters, if able.

Sing all the rain songs you know, "Rain, rain, go away, come again another day" and "It's raining, it's pouring, the old man is snoring ..." while noticing the rhyming words in the songs. Make up your own rhymes, too! When you use a familiar tune and make up new words, children usually find it easier to pick up.

Have fun!

Tuesday, March 1, 2011

Olympic Efforts!!

Even though there is not an Olympics this year, you can still do some training and competition! It is so important for children to have lots of exercise and physical movement - get out there and make it happen! It's easy to put together a simple program of activities using items you may already have around the house or classroom. If you do a few games or exercises each day, you can stretch it out over a few days or a week - culminating in a Closing Ceremony of your choice!


First, generate interest in a Kids Olympics by asking your children what they already know about sports ... skiing, skating, hockey, snowboarding, Gymnastics, swimming, etc. Build the conversation by sharing your own experiences with athletics or your memories of Olympic athletes (or other sports figures!). There are lots of clips available on Google, YouTube, etc. to help explain the concept of the Games to children - just be careful to preview all clips before sharing - titles do not always reflect content. Talk to your children about competing and taking pride in their accomplishments - stress the value of trying and training, and the concepts of winning and participating.

A trip to the great outdoors is a great option for those who are able. Any time you can fit in a little large motor activity, go for it! If you are looking to do a competition indoors or in a more controlled way, you can come up with your own games. Try putting together "Our Own Olympics" with fun and games for all!

Here are some game suggestions that you can do at home or school with little preparation:
(A punch card or sticker card is an easy way to keep it organized!)

Sock Skating: shoes off on a smooth surface and you can practice some twirls, figure eights or, in a big enough space, some speed skating! Great for the large motor stretching!

Balance Board: using a piece of 2x4 or some long wooden blocks, practice walking on the thin raised(just the depth of the blocks) platform to work on balance!

Olympic Ring Toss: use bean bags and some hula hoops or a piece of rope made into a circle to do some tossing for depth perception and eye-hand coordination.

Precision Racing: Plastic egg on a big spoon - find a friend and race up and down the room or outside - great exercise for coordination, balance and it's fun!

Tumbling - on a soft surface with supervision, rolling races (roll like a rolling pin!) are action-packed. (Or down a hill!)

Keep going ...  inventing games is half the fun! Perhaps your athletes have some ideas, too!

For a related art project, trace children's hands on flame-colored tissue paper - red, orange, yellow - one set of each if you can! Wrap a paper roll with black paper or have them paint them black and then attach the hands to the top - now you have an Olympic torch!


Make some hand-made medals together, going over the five colors of the rings - every country participating, at the time the logo was developed, had at least one of these colors in its flag! The five rings represent the five continents (North and South America were considered together at the time, Europe, Africa, Asia and "Oceania") of the world - and the fact that they are all joined together for "unity" - kids understand that concept!


I like to finish off with individual photos of my Olympic athletes, standing in front of the flag, wearing their hard-earned medals - and huge smiles! They make a great keepsake - and, who knows, maybe it will be part of their own Olympic profile someday! :)