Showing posts with label food projects. Show all posts

Wednesday, December 9, 2020

Winter Fun Kit - Snow Daze

If the holidays are overwhelming with toys, emotions, schedules ... try something new :) 

To take the stress away, especially when things are upside-down due to COVID, gift an “experience” to be enjoyed in the after-holiday blah time. January can be such a let-down, and with socializing restrictions in place, at-home activities are the way to go!

There are so many subscriptions and kits out there that look super interesting but just a little different from what I was picturing ... so I made my own. And, you can too! 

I ordered a few craft items from my favorite craft supplier, to make some painted craft stick snowflakes, which will be fun to paint and assemble, and not require too much help from already-stressed adults :) On my list was also some felt, buttons, pompoms, and wiggly eyes to make a tabletop put-together, take-apart snowman decorating kit for hours of fun. 

Playing indoor games together will put some smiles on your kiddos’ faces AND get them some much needed non-screen time :) Oriental Trading had a snowball bowling game and a snowman building spinner game that fit the bill, but it would be easy to put one together yourself for very little cost. :) A few giant white pompoms and some upside-down paper cups and voila! 

A recipe for a snowman treat to make, with ingredients included, will fill out the “make it” selections - so simple with wafers, frosting and candy eyes! I am including some fruit roll ups to cut up for scarves ⛄️ 

Of course, I included a few Snow-themed books, aged appropriately for the recipients of my particular box. Adding to book collections is one of my favorite things! 

Everyone LOVES to get mail, so I will give a certificate at the holidays and mail the box after the New Year! 

Someone will be having fun! ⛄️⛄️⛄️⛄️⛄️


Thursday, August 27, 2020

Q Camp: Getting Some Final Summer Fun In!


It's getting close to the end of the summer here and there are still many restrictions in place. Looking for at-home things to do? Here are some links to throwback posts that gather some fun activities together for you :)

#1: One favorite, which is low to no-cost, is "painting" with water out on the hard pavement - sidewalks, driveways, whatever you have :) Here's a link to fun water painting activities:

https://makeearlylearningfun.blogspot.com/2015/08/water-painting-fun.html


#2: Plan some food fun for a rainy day :) Playing with food is usually discouraged but, using what you have in the house, you can figure our some fun "lessons" that encompass math, art, science, etc.

https://makeearlylearningfun.blogspot.com/2015/08/an-apple-is-not-just-apple.html


#3: Literacy for the win! Look for a great book to build a fun activity with! Remember, YouTube can help out with finding books, if you don't have it or don't want to mingle to get it! Googling images will put the cover pics right in front of your child :) It's great when interest in a story generates an extension activity - check this post out for some literacy and small-motor fun!

https://makeearlylearningfun.blogspot.com/2018/08/books-to-love-commotion-in-ocean.html


#4: Character book bags can be so much fun! Team up with a few friends to try out this activity - friends who haven't seen each other or might be remote learning might enjoy this interaction by dropping off and circulating a character or two :)

https://makeearlylearningfun.blogspot.com/2011/08/character-book-bags.html     


#5: This post, entitled "Summer Fun!," gives you a bonus - 10 more ways to extend your summer fun!

https://makeearlylearningfun.blogspot.com/2011/07/summer-fun.html


End your summer with a great week! And - have fun!!


Saturday, May 9, 2020

Remote Learning: Growing Things (With What You Have at Home!)


Want to grow something and show your children at home the process?

No seeds? No problem!!

Don't despair if the sunflower project you always do in the Spring isn't able to work with Remote Learning! Look around at what you (and your students!) already have at home - you'll be surprised what you (and they) can do when you start thinking outside the box :)


Soon after we realized we weren't going back to the classroom anytime soon, I looked around at what I had - in my fridge, my pantry, on my block ...

The first thing I tried was rerooting romaine lettuce. I had a package of lettuce with the stalk part still attached and I had seen a YouTube video showing how to regrow the lettuce. I can't believe how simple this was! Just cut the lettuce about 1 1/2 inches from the end and take the stem piece and set in water in a small container. Overnight, I could see the regrowth. Change the water daily and within a week or two, you'll see roots start to appear. Plant in dirt and watch it grow!


Seeds from an apple were next, after eating it, of course. I put the seeds into a sealed plastic bag in the sunlight, with a small, damp paper towel and waited to see what would happen. This took longer, but after about 7-8 days, roots and a stem started to appear. A few days later, it was transplanted into dirt and continues to grow :)


Look around your environment, too, not just in the house! These "helicopters" fall from a tree near me every year, so into a bag they went, and .... after two weeks (patience!), a small root system was kicking in!


Carrot greens can be grown from the tips of carrots - good for seasoning and garnishing :)


To grow potatoes, I cut a section of a potato that had some growth at the eye, and put that in a plastic bag, too. I left it in a sunny window, and forgot about it ... until this root system caught my eye :)


No seeds, no problem! You can teach and they can learn - using things that are already around in the home!

Have fun!


Wednesday, August 26, 2015

An apple is not just an apple

Early childhood educators look at things every day through the eyes of their kiddos, in order to help them learn. They know that there are lessons in every single thing a child encounters ... and that helping them see the world so full of possibilities, at an early age, will help make them into life-long learners. Parents can do this, too!

It's not even so much about what the objects are, but what you can explore with them :) Even something as simple as - APPLES! Grab a bunch of apples next time you are in the market ... it can lead to activities full of math, science, and art skills!

First, have your children count the apples into a bowl - one-to-one correspondence work. Next, they can arrange them in a row, from largest to smallest - size and order. Then, use different colored apples to make a row of green, red, green, red or ... green, yellow, red, green, yellow, red - all kinds of patterns. Cut one apple into four equal pieces - fractions. Count them out into equal groups - simple division. (You can do all the above activities with construction paper apples, as well, if you're out of real ones!)

Now, examine the seeds to see how they are encased, how many there are, what size and shape they are, etc. You're doing science! Try a search engine to find pictures of the apple trees that produced these apples - see the different stages of growth! Your children will be excited to see how their own apples came to be! Even setting out a slice and watching it decay over time can be a cool lesson - but, maybe a little gross ... so, kids will like it!

Explore art with apples! Use half of an apple dipped in a yummy caramel or cream cheese sauce to make stamps on a paper plate - see what shapes they look like. (You can also do this with paint - orange paint stamped with apples make great pumpkins! Just don't eat the apples, then!) Let your children come up with ideas ... they will find ways to use the apples that you never even thought of :)

Read "Ten Apples Up On Top!" Your kiddos will love the silly illustrations and get in plenty of counting practice while reading. You can make your own counting book by taking silly-face pictures and cutting apples out to put on top of those faces, one per page ...

Early childhood educators have always known - an apple isn't just an apple! Explore ...

Have fun!

Tuesday, July 22, 2014

Reading Treat: Very Hungry Caterpillar Fruit Salad

Celebrate Eric Carle's birthday this week (July 25, 1929) by making a beautiful fruit salad with your little ones!

The Very Hungry Caterpillar, by Eric Carle, is a favorite of children all over! This adorable book has the recipe right in it's pages, so sit down and read it again with your child to get started. Make sure you have a paper and writing tools ready, so you can help your child spell each ingredient ... getting some letter and number practice in while you do! (Only the first five fruits should be added - after that, you might get a bellyache like the caterpillar!)


When you have your list, check off what you have in the kitchen and then make a trip to the produce/grocery store. Your child will want to help find the ingredients, weigh them, and purchase - great lessons all the way around!

Make sure to wash all the fruits before using and cut up (with supervision or adult intervention) into small chunks. Add a little citrus, orange or lemon, to keep it fresh.

Now, enjoy your Very Hungry Caterpillar Fruit Salad as a treat or as part of your meal!

Have fun!


Wednesday, July 13, 2011

Summer Camp: Pirate Play!

Playing Pirates is always a BIG hit - with boys and girls! Gather some props to make a pretend pirate ship - a large box to decorate would be great, but just arranging some chairs together and tying on some black streamers or fabric to connect them will give your children a place to gather! Add a paper-plate ship's wheel  and they will be set to go!

Get in a bit of geography by having a globe on hand and spinning it to choose where you are setting sail for. Have the children find "home" on the globe as well! If there's no globe available, a large map will do :)

Every pirate needs a spyglass, so each child should start out with a paper towel tube and decorate accordingly - use markers or stickers to make them really cool! There are lots of clip-art pieces on Google images to try out - pick a few and assemble!

If you have any eyepatches lying around, or other pirate regalia, put them out in a dress-up bin - try some all-purpose vests turned inside out and some old shirts cut with ragged edges to make pirate gear! A sash cut from red and white striped fabric or an old scarf pulls the whole look together!


For more crafts, supply a key with simple mapping symbols and paper and markers for the children to make some maps - don't forget a big X to mark the spot where the treasure is!  If you're looking for more fine motor practice, you can find free pirate coloring sheets at several sites on the internet, as well!

Before all the fun begins, come up with a "treasure" to be split between the pirates - beaded necklaces from the party store and "gold" coins work well - and hide it all in a special container somewhere. Then, devise some clues that will guide the group from place to place, each time to find the next clue until the end of the hunt! Here are some to get you started:


Treasure Hunt!
Cut these clues apart and hide them as directed – or make up your own!


Under the fence where the squirrels run                        (have this ready to start the action!)
Look for clue #1!


Find a toy that’s the color blue – that’s                                   (hide this under a fence!)
Where you’ll find clue #2


Look around the base of the big tree                                       (hide this under or near a blue toy!)
If you’re looking for clue #3


Beside a window or a door,                                                  (hide at the base of a tree!)
You will find Clue #4


Look under a rock or two                                                     (hide beside a window or door)
To find the fifth and final clue!


This clue will send you around the lot                                         (hide under a rock)
Until you find where X marks the spot!

 (attach a rolled up REAL treasure map to the last clue -  ready to point out where you’ve hidden your “treasure"!)
 

If your treasure includes some gold coins, get in a little fun "arrrr"ithmetic - counting and adding up sums!

For snacks, try some "treasure" goldfish crackers in silver cupcake papers or some pretzel logs and fruit roll-ups cut up to form into a pirate ship - fun!

Books to read with your little pirates:
"Shiver Me Letters: A Pirate ABC" by June Sobel
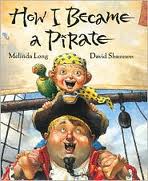
"How I Became A Pirate" by Melinda Long
"The Night Pirates" by Peter Harris
"Tough Boris" by Mem Fox
"Grandma and the Pirates" by Phoebe Gilman
"What's Inside a Pirate Ship"

Have a great time!

Monday, July 11, 2011

Summer Camp: Knights and Ladies of the Castle!

Get ready for this week's camp idea by assembling a few arts and crafts supplies: some cardboard, markers or paint, some craft foam and writing materials.

Set up some props to center your activity, either outdoors or indoors. Mark this area by hanging some sheer fabric or paper streamers or use my idea - take a 10' by 10' outdoor tent canopy (borrow one if you can) and only raise it up to half-height. This makes a perfect castle area for pretend play, after you hang a few decorative flags and some streamers! You might want to designate one or two special chairs as thrones and have some space for craft assembly and "fine dining."

Of course, dressing up is always fun - see what you have in the way of royal garb and add fabric or towel cloaks, if needed. Jewels, such as party-store rings and beads of all colors go over well, also :)

For crafts, start with a crown or tiara for your young royals. Every prince or princess, knight or lady likes a crown! Use light cardboard or craft foam to prepare some crown shapes beforehand (or order from a catalog supply) and then make available some glittery baubles and colored foam pieces to make them sparkle. It's always interesting to see who will make theirs a repeating pattern and who will go for "more is more!"


Making a shield with your personal crest is next on the fun craft list! Cut some small shields out of cardboard with long rectangular strips to be mounted on the  back for holding. Decorate as you wish with your favorite things - symbols, initials, cut-outs, stickers, whatever you want! Stripes of different colors or contrasting colored tapes could also be fun! When you have it just the way you want, turn it over and attach your handle - now you're ready for anything!


When you're ready for another activity, story-telling is an old favorite "at court." If you want to use props, you could use paper cut-outs, or copies from your favorite stories (mount them on a craft sticks for puppets) or maybe you have a set of finger puppets lying around - I've had these for a long time (IKEA has great little finger puppets!).

Lastly, write your own fairy tale!  Draw or copy some pictures and have your children dictate a beginning, middle and end of a story - make sure there's some action (maybe a witch or a dragon!) and a happy ending ... and dress it all up with a special cover - it will become a new favorite!

When it's time for snacks, serve your royals on a silver platter - maybe some fancy cheese and crackers and a bowl of fruit - with lovely napkins and a special cold drink! Have fun!

Thursday, July 7, 2011

Summer Camp: Pretend Camping!

When the summer starts to get "old" for your kids, here's a do-it-yourself fun idea: hold your own summer camp days, right at home!

All you need is a little pre-planning and some imagination - start now, while the fun is still fresh and plan ahead for later in the summer!

In the past, I've held camp during August (basically crafts, games, stories and snacks!) - parents and children were looking for things to do by that time of the summer! Plan a morning full of activities - you could even switch off with another parent or two to free up some me-time!! It's always more fun with a few:)

I'll start you off  with ideas for a theme that worked well for me - and follow up with more themes in more posts - so, check back!

Camp-In Day

Set up a small tent outdoors (or indoors!) and gather up some quilts and cushions. Make sure you have the fixings for a pretend camp-fire - I found a little aluminum baking pan that we adorned with yellow, orange and red tissue paper flames - some rocks or wooden blocks placed in a circle with some sticks in the middle would do nicely, too!


Meet around the "campfire" to get started - talk about camping and outdoor fun - then go on a little "hike" through your yard, neighborhood or a near-by park. Have a small plastic container along for a sensory tub to be filled with rocks, pinecones, leaves, small sticks, etc.

When you are finished, have a basket of books related to camping available :)  There is a Berenstain Bears book - "Go To Camp" and a great Kevin Henkes story "Bailey Goes Camping" to get you started! While some are checking out books, have the other children rotate through different activities, just like in school, so each child gets to try everything!

For crafts, have available some TP rolls to make into binoculars for viewing nature. Use paint or markers to color or have stickers available to decorate. At another spot, have some sturdy paper and glue to turn your nature finds into a cool art collage! Get a little letter/sound practice in by trying to label the found items! For pretend play, gather some plastic plates and picnic items and they will do the rest!

For a snack, try some trail mix (cereal mixed with raisins and nuts, if permitted) OR assemble your own kid-s'mores, using graham crackers with layers of chocolate cake frosting and marshmallow cream spread on top! Have water or juice available to stay hydrated!

Knowing how kids love "souvenirs," you could also find some tiny compasses and bandannas at a party store or on-line catalog! When you're ready, you can close the "camp" by singing some favorite songs around the fire! Have fun!

Monday, May 9, 2011

Bug Party: Early Childhood Exploration!

Plan a "party" to celebrate and explore BUGS! Gather a few things together to make your children feel like explorers - we chose safari hats and bandannas from the party store, a simple bug collecting case (ours was from a craft store, but you could make one from a recyclable container) and a magnifying glass. Then, round up your bug-hunting crew (we did it for a small birthday party!) and get ready for an adventure. Plan on visiting a nearby park or garden, and plan your route with a rough map - map-makers welcome! (On our walk with a few three and four-year-olds, we decided to make a work-crew guidance device (!) using a length of rope and making a big knot for each child to hold onto - the leader held one end of the rope and a spotter took up the rear! We told them we all had to help carry the rope in case we needed it!)

Once you arrive at your destination, have an adult or child model for the other children how to move  rocks without hurting bugs, how to slow down and look carefully, and how to stay very still while "hunting" - then, set off on your own or in pairs, once a perimeter has been established! Cries of "check this out!" and "quick, look at this!" will ensue as everyone has fun finding a variety of insects.

Make sure to have a digital camera on hand to record some of your finds for review later! Have some books about bugs along to read or another activity for when you start to slow down ... we sat down and did some body art, coloring ants and ladybugs on forearms or cheeks with face-painting crayons.

Later, prepare some special treats with your "buggy" crowd:

Ants on a Log
Use sections of celery sticks, spread on cream cheese and add a row of raisins for ants. I've also seen this done with variations using pretzel logs, peanut butter and craisins :) Watch your food allergies!

Dirt Dessert
Mix together one large vanilla pudding mix and two cups of milk. Add 1/2 cup of powdered sugar and 8 oz. of softened cream cheese - mix until blended. Stir in 8 oz. of Cool-Whip type topping. If you do this with the kids, make sure to count and measure along the way - math!

In another bowl, combine 1 1/2 lb. package of crushed Oreo cookie crumbs and 1/2 stick of melted butter to look like dirt. Alternate layers in a cups or a bowl, ending with crumbs on top! Add some gummy worms for fun and refrigerate!

Yum!

Wednesday, April 20, 2011

Kids in the Kitchen: Family Pizza Night!

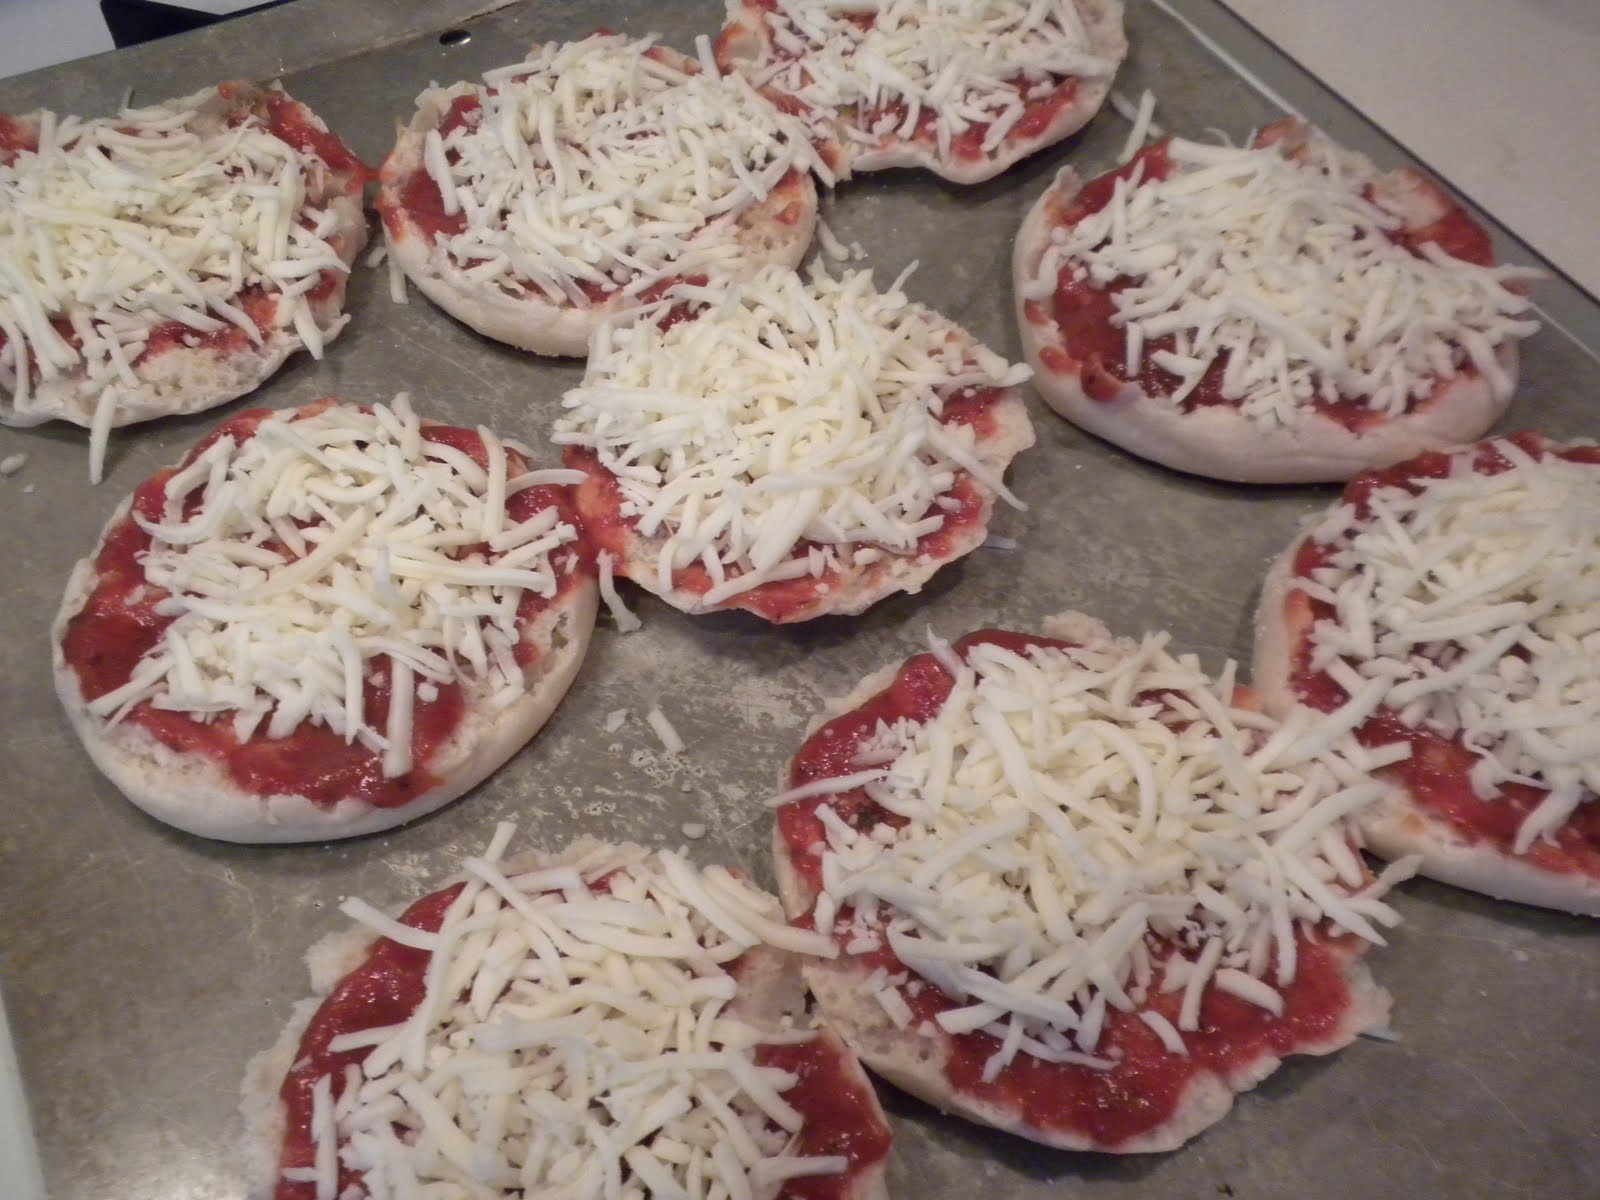
Every once in a while, when the week has been particularly hectic (!), it's fun to have a family cooking night! Try this with some super-simple English Muffin Pizzas!

This is something that you can get your child involved in and they can do just about everything themselves :)


Ingredients are very easy to find:

English Muffins or your choice of "crust"
Pizza or Tomato Sauce
Shredded mozzarella cheese
Toppings (if desired)
Olive oil (optional)

Help your child to split the muffins and place on a cookie sheet, open face up. Have your "chef" spoon a few tablespoons of sauce onto muffins and spread with the back of the spoon. Work in counting and measuring skills as you go! If you want to add any spices - basil, oregano, ... - do this now.
Then sprinkle on a few teaspoons of cheese to cover the top and, if desired, add toppings. Drizzle with a little olive oil and bake in a hot oven (350 degrees) for 10 minutes or until the cheese is melted. (Some chefs like to put under the broiler for a few minutes instead - whatever works for you!) Cool a bit and serve.

Kids have fun doing the basic recipe and even more fun making silly faces with the cheese and toppings - might be a great way to get some veggies in, although pepperoni was always a favorite in my house! Even better is the opportunity to spend time with your child, conversing and laughing - and eating!!

You can extend your meal by making look-alike desserts from dessert shells, whipped topping and berries - complete with more silly faces! :)

There's lots of lessons here: math (shapes, counting, measuring), science (changes from heat) and cooperative working together - but, most of all, language development, social skills and family fun!!

Monday, April 4, 2011

Cookie-Making Math

Get ready for some baking!
Make a batch of cookies with your child – and cook up all kinds of fun! You can build all sorts of learning into a cooking session… measuring your ingredients, counting your cups and teaspoons, and dividing the batch up into equal parts.
First, gather together all the ingredients: Take stock of what you have in the house and what you need – your child can help! Have them make a list for shopping, using beginning letters and/or pictograms, then you fill in the blanks to complete your list!

 Maybe you need sugar, two eggs, and some chocolate chips … your child’s list attempt may look like this: 

– now go shopping!

When you have all the ingredients assembled, let your child do the counting when you need 3 cups of flour, or a cup of sugar and let them use their developing strength to mix it all up or roll it out! It’s good for them!
When placing dough on cookie sheets, encourage your child to set up equal rows and count cookies by ones, twos, etc.  - Great counting practice!
While the cookies are baking and cooling, make time for you and your child to write and illustrate the story of making the cookies: Have your child dictate the words, or attempt to write the words  - and illustrate! Make sure to do an author's page, as well, complete with a picture of the cookie chef with the cookies! (If you're doing this in a classroom, compile for the cutest recipe book ever! ... Not ready to become a baker? You can still pretend-cook and use store-bought cookies for counting lessons!)
And, there are still more math lessons left - distribute the cookies into several piles forming equal parts. For example, 12 cookies divided into 4 piles … one at a time … equals 3 cookies in each pile.
Finally, since your child got to create these treats, make sure to get a little subtraction lesson in, too! Four cookies on a plate minus one leaves how many?
Yum!!

Tuesday, March 22, 2011

Restaurant Readiness

If you’re planning a trip to a restaurant or somewhere else where you want your children to behave in a quiet, refined manner (ha!), make sure you go prepared!  While some restaurants cater to children and have supplies on hand, like crayons, crackers, etc. – never assume!
Simple To-Dos for a Relaxed Meal:
Bring your own snack: Since the wait can be long and good service can take time, bring along something to stave off the hunger! Stash some crackers, pretzels or fruit snacks in a small container – little snacks like pretzels sticks, goldfish or teddy bear cookies also have the added benefit of play – make shapes, play counting games, tell stories, etc. A little imagination goes a long way! If you have packed some folded computer paper that can be turned into a special placemat, your child can make "bowls" for the goldfish or forests for the bears to hide in!

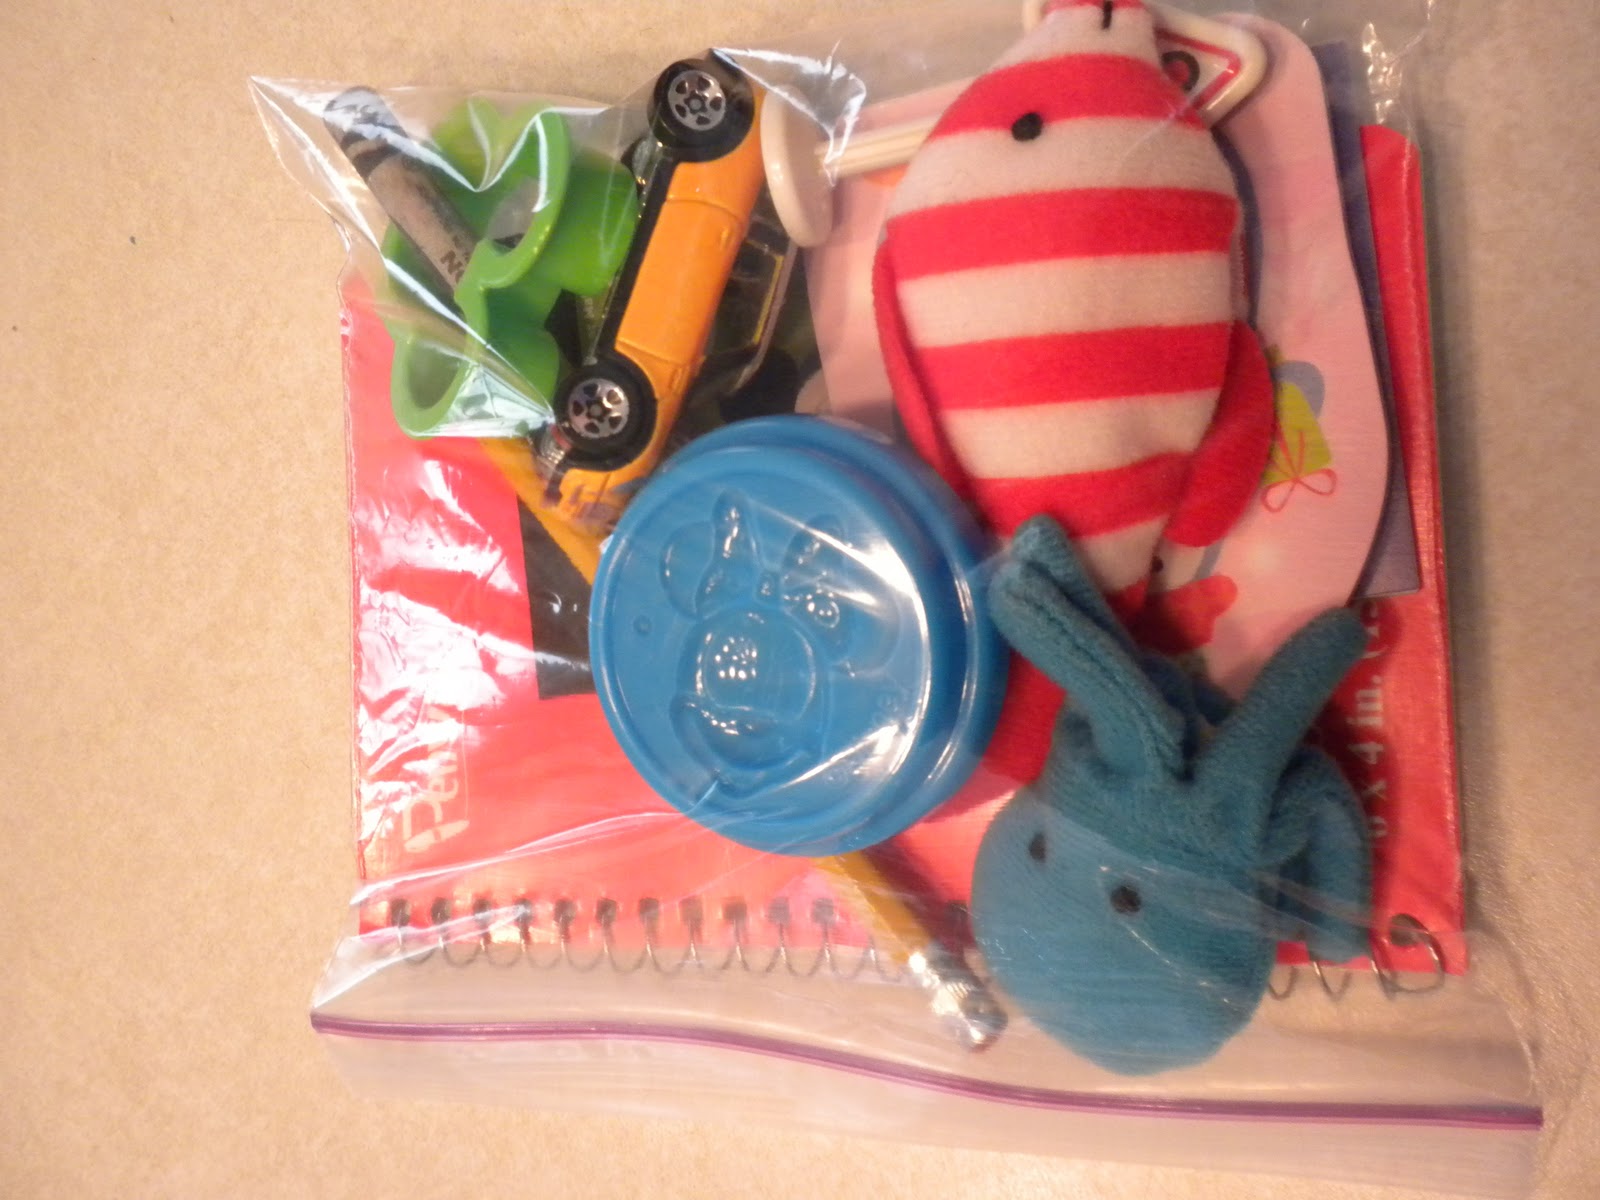
Pack a surprise kit:  Use a small container or pencil case to hold some interesting objects for your child to play with. (Mine all fit in a sandwich sized plastic bag!) Leave out anything that will break, make noises, or leave permanent marks! Include small soft toys like finger puppets, one or two cars or figures, tiny playdoh containers, as well as little stickers, a mini-notebook and just a few crayons or a pencil …. And, you are set for anything! Make sure that some of your items are do-alone things, as you probably want to enjoy your meal, as well! J (Hint: Next time you have something that comes in the cereal box or an extra McDonalds toy, stash it in a special place to be resurrected – “new” is always exciting!)
Schedule smart:  Sometimes our expectations for our children are completely out of line with reality! If possible, try to schedule your dinner out to be within a normal range for your child – expecting a child to be charming when it’s already way past their regular bedtime is just setting yourself up for failure! If it’s not optional because you are a guest or it’s a special occasion, consider a mini-meal at your child’s regular meal time before going to the restaurant, and just grazing at the restaurant. Less stress is always better!
Use the opportunity to go over good manners – role play before your visit, allowing your child to take on different roles. Practice how to properly ask for something and how to express appreciation! We can’t expect them to be born with social skills -  prior “play” should make them more comfortable and avoid some potential pitfalls!
Those children who are able can also be put to work with menus - write down their favorite food on a sticky note or a bit of paper - e.g."chicken" or "pasta" - and have them find it in the menu. Finding individual letters would work for younger learners! Developing skills with oral language by just relaxing, enjoying each others' company and having conversation is always wonderful, too!
So, on this trip to the restaurant, you will be exposing your child to new situations, broadening their vocabularies, giving them opportunities for math exploration, letter recognition, imaginative play and working on small motor skills – and, hopefully, enjoying yourself as well!!

Have fun!