Showing posts with label recycle projects. Show all posts

Wednesday, January 27, 2021

Creating Fun During Lockdown

The spring of 2020 was long and the summer and fall kept it going ... by this winter, anyone who has been cooped up with their kiddos is looking for some new ideas :) 

We’ve had a lot of success with cardboard boxes over here ... they have made everything from puppet theaters to step-in wearable race cars to furniture for stuffed animals. And, thanks to Amazon, there are SO many boxes around!

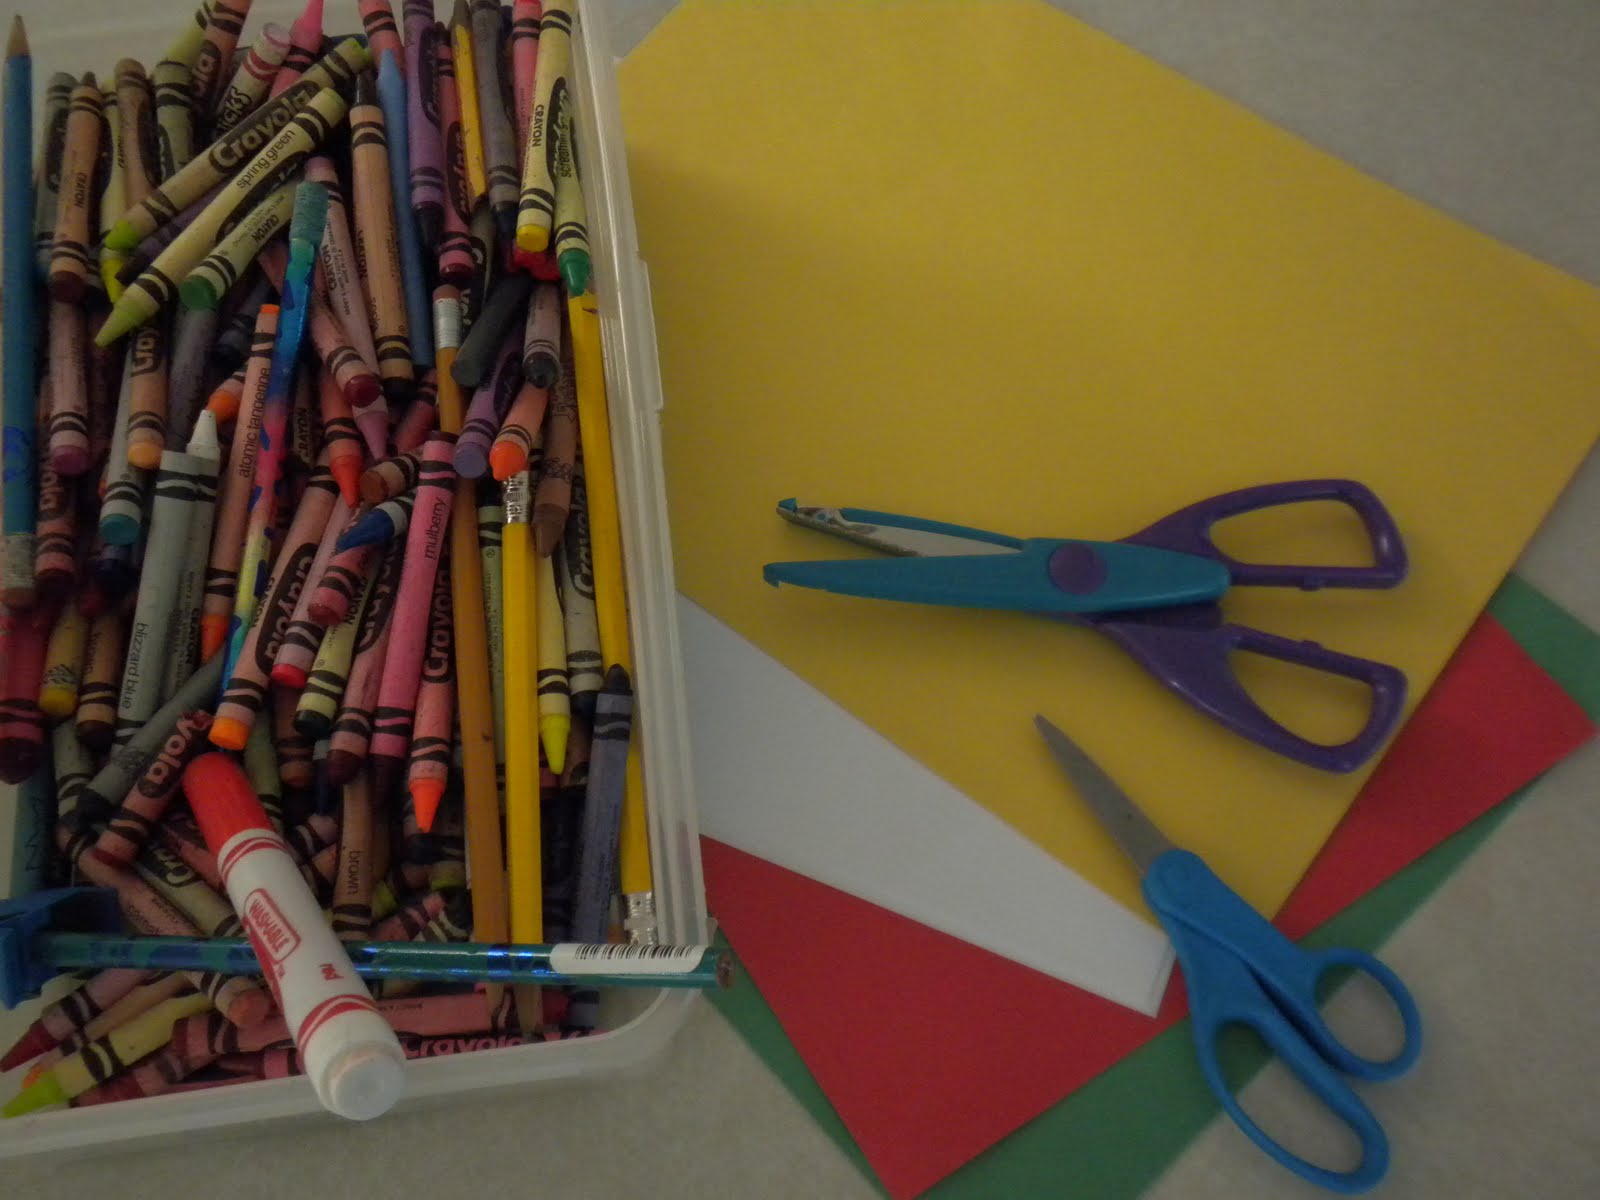
It helped to put together a cart of accessible “art” stuff. There is an organizer of crayons and colored pencils, all kinds of scrap paper, and some recyclables. Included is a few card games, some letter tiles and wipe-off boards. 

We’ve added glue, glue sticks, kid scissors and rulers as time has gone on - and scotch tape, which is very popular with our kiddos. The idea is to offer access to some materials which are always “open” for autonomy in creative play. 

When you’re looking for more ideas, let your children lead you. They may want to try to do something new ... last week, we tried some wood working in the workshop - just simple sanding and drilling - and sewing with bright threads and big needles, no plan in mind. Cooking or baking is always a hit with the kids here, too. You can search the internet or Pinterest for just about anything :) There are so many ideas out there for easy, inexpensive fun. 

Pair an activity to a book for extra fun - even books you don’t have in the house :) YouTube has LOTS of books read aloud, when you’re not comfortable going to a book store or library, and your budget is groaning from adapting to life at home. Follow your child’s interests and become experts on dinosaurs or planets ... 

To get you started, here’s some “Camp” activity ideas from my blog ~ tweak these themes to make them “COVID Camp” themes, instead of “Summer Camp” ... pick one and make a day or weekend out of it :) 


Camping Theme:   https://makeearlylearningfun.blogspot.com/2011/07/camp-out.html

Sunday, December 6, 2020

Learning Tools: Recycled Bottlecaps

Looking for ways to do more hands-on learning? Running short on supplies with remote and hybrid learning situations? 

Make your own learning manipulatives to use at home or at school! 

Recycled plastic bottle caps are easy to gather in a short time and come in a variety of colors and sizes. They are perfect for so many different uses - in literacy, math, and even art. 

As you work on letter recognition, you and your kiddos can put together a set of upper and lowercase letters for practice. Play a matching game with them, placing the uppers over the lowers and checking them together. You can also supply a name strip with the alphabet for self-checking :) 

Write sight words on larger caps and use them to manipulate into sentences - even “silly sentences” can be lots of fun and get your little friends interested in reading and writing :) Then, have them copy the sentences down for some writing practice - good fine-motor work!

At math time, use different colored bottle caps to make patterns - ABAB, AABAAB, ABCABC. Repurpose your collection to act as counters when making up or solving addition and subtraction number stories, or practicing basic math facts. See what other uses your budding mathematicians will come up with! Maybe sorting by attributes - size, color, ...?

Finding art applications is easy, too! Some friends may use them as “tiles” in a mosaic or to arrange into pictures. Others may use them as stamps or tracers with pencils to incorporate shapes into designs. They can also be glued into 3D forms as parts of sculptures, possibly using other recyclables. 

The opportunities are endless - see what your kiddos come up with! 

Have fun!


Tuesday, November 10, 2020

Start with a Craft!

Looking for a way to get your school days off to a good start? Want to do some fun crafts but your materials are limited due to remote/hybrid learning situations?

Consider beginning your day with a simple craft to push those fine-motor skills and get some conversation going for social-emotional growth between classmates, wherever they are learning :) 

Follow your class' interests, or the seasonal calendar, to determine what craft themes to explore... Halloween has just passed, and Thanksgiving is looming. Leaves are what's happening in nature, so just look around for inspiration. 

Keep supplies to a minimum, especially in these days of hybrid and remote teaching, and try to repurpose everyday recyclables or handy items. Have kiddos save cereal boxes and magazines at home, and prep families with a note to start a bin for cardboard and paper scraps, as well as safety scissors and glue sticks. (Be ready to supplement if these items are not easily accessible at home.) 

Then, try these tasks:


Stencils: 

  • Have children draw a shape on the flip side (inside) of a cardboard food box - cereal, fruit snacks, pasta - and cut it out. Try this with simple leaf shapes for starters :) They can get shape making practice and cutting practice with this - both great fine-motor activities!
  • Save the stencils for another day and use them to trace with pencils or colored pencils. The kiddos can color them in and draw in details of the leaves for a pretty picture.
  • Then, use magazines to find fall colors in ads and pictures, and use the same stencils to trace and cut out leaves to glue on another paper, making a collage.
  • Trace leaves on sturdy paper or even more cardboard, cut out, and use paint or markers to color. Then, find some yarn or string to make a leaf hanging or mobile.
Paper tearing:

  • Make a large shape on paper - circular like a pumpkin or an apple. Find orange or red paper to tear into small pieces - tearing is another great fine-motor exercise! Glue on to cover the whole shape. Trim paper around to complete and hang :) 
  • Make a series of large feather shapes on paper and cut them out. Trace a shoe on brown paper, or white paper and color brown. Tear other colors to cover feathers and assemble a turkey. Use markers or crayons to add details.
  • Cut fall colored paper (either construction paper or magazine paper) in strips and tear into pieces. Draw a tree trunk with brown or black crayons and use the pieces to create a picture of a fall tree.
  • Think about things in nature and Thanksgiving foods - torn paper can be used to make everything from acorns to corn on the cob :) Use the same processes to trace, cut and assemble - giving your students lots of practice!
Use your imagination to come up with other projects, remembering that some kiddos may not have access to lots of art supplies at home :)

Have fun!

Wednesday, April 22, 2020

Remote Learning: Look for Sight Words All Around!

Part of learning to read is to quickly recognize some words - the words we call "sight words." Each grade level has an expected list, and each class does things a little differently, but there are lots of small, simple words your child will begin to recognize, especially with fun ways to practice them :)

One resource that is available to you at home is the use of what we call "environmental print." It's the print that you see on packaging, newspapers, magazines, signs, etc. Before you throw away your recyclables, I have a fun "game" for you to play at home :)

Show your child the box or paper, and see if they can find any words that stand out, either alone or as part of (a chunk of) another word .... let's call it a WORD HUNT! Once you've found something, cut it out! I found all these words on my Raisin Bran Crunch box this morning, before I recycled the rest  :)


For another step, you could tape or glue these words onto index cards, or cut up cardboard (use the flip side of the box!) and you have brand new sight word cards! If you find matching pairs, you could do WORD MATCH! I found all of these - I know there are some matching words in this pile!


SILLY SENTENCES is the next game ... arrange the words in sentence lines to try to make sentences. Sometimes they make sense, sometimes they are just silly!! You might have to make some additional people, place or thing (noun) cards or action (verb) cards to form some complete sentences. Let your child draw pictures and help them sound out the corresponding words, so then they can use these when they have sentences to write for assignments.


Most of all, they will get used to looking for these words in the environment, tuning into literacy all around, and having fun with it!


Sunday, March 12, 2017

We Are Scientists: Think It - Make It - Try It!

Scientists have questions, try to figure out ways to answer the questions, come to conclusions, and record their information. Sounds like every young learner I've ever met!  So, let your kiddos know that they ARE real scientists ... and watch them get to work!

To get started, you can put together an assortment of materials that might be useful - and definitely will be appealing. At first, the children might just want to tinker with each of the materials but, before long, they will start to see possibilities for using them in different ways. The idea is to provide this "makerspace" where they can have a thought and then test it out :) For example ... What would make this ball roll faster? Farther? Hmmm....

PVC pipe, in varied widths and lengths is a great place to start. Your local hardware store may even have it pre-cut into shorter lengths - two feet is a very workable length for little learners. I made sure to include two different width sizes (1 1/2" and 2"), as well as different joints that fit one or the other - or both! My scientists had to figure out which would work together and which wouldn't! It has been the workings of many experiments in velocity, friction, air pressure, etc., all by 3, 4, and 5 year olds.


A standard set of unit blocks, as well as any Duplo or Lego sets are great to have around, too. They can be used in conjunction with each other, as your child sees fit. Simple things like shoelaces, twist ties, and velcro strips make great connectors when building. Ping pong balls, available in colors and 6 to a package, were a big hit from my local dollar store!

Small cars, marbles (depending on the age of your children), and any small, light balls are all terrific tools for testing theories on speed and direction. Make sure that they are within reach and at eye view, so that inspiration hits :)

The idea is to introduce these elements but then STEP AWAY. Let the children formulate questions and try out hypotheses through interaction with this variety of resources.

Ask how, what, and why questions to help steer them, if they are stalled.

Maybe they want to see how to make the cars go faster or farther. How could you make that happen? What could you use?

Maybe they want to roll a ball so it goes farther than before. What would help with that? How can you use it?

Prompting to problem solve is the way to go!

My crew wanted to roll ping pong balls farther and faster - so they built this .... on their own!


See what your little scientists can come up with!

Have fun!


Sunday, February 12, 2017

Learning with Collections!

There are so many things your children can do with a collection of objects! It could be coins, shells, rocks, buttons! I can remember, as a child, being fascinated with a jar of multi-colored buttons that sat on a shelf at my grandmother's house. We would pick some, or pour some out, and  play with them, making up all sorts of games.


There are many simple things your children may choose to do ... many of them math and science related! Let them play with collections, and make decisions about what to do with them. Their ideas might surprise you! They may first choose to just examine up close and begin to notice differences between groups - colors, sizes, shapes ...  noticing is the first step to classifying and sorting!

Counting collections is another great next step, while they are doing some examining :) You can add in some math vocabulary such as more, greater, less, fewer and they will have concrete examples right in front of them.

Then, patterns! Your kiddos may choose to make a pattern, or, if not ready for that, to continue one laid out for them - red, white, red, white ... what comes next? Ours asked for pipe cleaners to thread buttons on - in patterns! Simple patterns can evolve into more complex - instead of red,white red, white (ABABAB), they may try ABBABB or ABCABC patterns, using more colors or sizes.

Sorting mats have proven to be LOTS of fun for my kiddos - and a great focusing tool. Simply take large paper, draw a grid and laminate them to hold up through multiple uses.

My kiddos have pulled them out to examine all sorts of things ... shells, coins, rocks ....

They even took the plastic animals and sorted them by habitat - ocean, farm, polar, etc. Have them choose an attribute to sort by - color, size, shape, shiny, flat, bumpy, etc. -  and then figure out what goes where. They may have to make subgroups and it could generate great discussion :)


Attention to detail is something my friends are really getting involved in - they want to examine with a magnifying glass and do some sketching to really try to be scientists :) We talk all the time about how scientists observe, sketch and write about what they see ... collections are a great way to put this into play!

Have fun!

Thursday, February 18, 2016

Have a Cutting Party!

Let your kiddos cut! 

Children need to be comfortable cutting, in order to stay on task and work efficiently once they start "real work" in school. To prepare, give them the opportunity to learn how to operate scissors, cut on straight lines and follow curvy ones. Space these "lessons" out and make it fun - success will not be achieved in one sitting :)

  • First, have them learn the grip and motion of the scissors - open and shut, little "bites."
  • Use strips of paper just wide enough for a little scissor to cut, and help your child feel success in cutting it up. 
  • Next, use snakes of play dough or drinking straws for cutting practice, to give some resistance.
  • Then, you can draw lines on paper or have them draw the lines and cut along them! 
  • When they are getting good, use stencils to trace around shapes and then cut them out!
  • Old magazines are treasure troves - pick a theme for a collage and cut away! (Get some glue stick practice in, too, when you glue them all on a piece of paper!)

Make it fun!! Pull out the toy catalogs and the coupon pages - let them go crazy cutting with no real goal in mind. Steer them in the right way to grip the scissors, making sure that their thumbs are placed correctly on top.

Introduce the "helper hand" to hold the paper that they are cutting, in order to manipulate the paper as needed. 

One teacher friend pulls out the party hats and calls it a "cutting party!" Whatever goofy trick it takes to make it fun for your little ones, try it out! The more practice they get, the easier cutting will be for them down the line!

Thanks to my friend, Kelly, for her great cutting tips! Have fun!


Monday, September 28, 2015

Rock On!

Have some fun with rocks - and let your little ones explore and learn! We took some stones that were flat on at least one side, and used a paint pen to make upper-case letters on them. Then, we put them out on a table, and . . .

First, there was lots of interest ... and lots of questions!

"What are these? What do we do with them?" We didn't ask our little ones to do anything in particular with the rocks, but soon they were searching for their name letters and lining them up, calling friends over, and trying out new combinations :)


They noticed that some of their names started with the same letter, and that they had to share letters to make friends' names.

Next, maybe they'll want to play a match game - we'll need more rocks!

How about numbered rocks to line up in order ... or addition rocks! We could try shapes and patterns one day, too!

Have fun!


Tuesday, July 21, 2015

Open-Ended Recycled Art

One of the coolest ways to spend a summer day (or any day!) is to do some art with recycled materials :) If you're like me, these days your recycling bucket fills faster than your actual trash ... So try a little trash to treasure creativity! Some of those items sitting right now in your recyclable bucket will inspire your child's imagination. Make sure to start off with absolutely no plan in mind ... just bring out some materials that could be interesting and let your children explore.

If you need a launching point, try examining an egg carton together and do some verbal brainstorming with your little ones. "What could we make with this? What animals have bumps like this?" Maybe they will want to paint and personalize the outside and use it to collect cool stuff on a nature walk. Then, see what other ideas they have! Egg cartons can become so many things -  bugs, caterpillars, finger puppets ... there is no limit to what your children might think of. (If you do a search online for egg carton crafts, you will find all sorts of ideas.) Your child might be inspired to make a whole collection of insects or other animals by dividing the carton up (adult help needed for cutting) and using markers, googly eyes, and pipe cleaners.


Boxes are another source of unlimited creativity. Use empty cereal or cracker boxes to make a whole town, farm, or big city to play with. Cover boxes with craft or construction paper and your child can personalize with details, such as doors, windows, and even signs for businesses. Lay it down. add wheels, and it becomes a vehicle.
The important thing is to let your children take ownership of the activity, with limited prompting and assistance from you!

Cardboard tubes are cool - there is always something to make with them! Paper towel rolls can be telescopes for pirates or adventurers. Smaller tubes can become binoculars with a little imagination, string, and some markers. Your children may want to connect some tubes and make tunnels to send some bouncy balls or tiny cars through.

Don't overlook your junk mail, either. Your little guys can use recyclable newspapers and magazines to practice cutting things on lines, and then gluing those cutouts or papers into collages of favorite things or mosaic designs. Toy store fliers and catalogs are particular favorites for little ones :)

Have fun!

Monday, June 25, 2012

Water Play!

Water is so much fun to play with - and a great learning tool, too!! It can be a fun mess, though, so summertime is a great time to do it, if you're worried about getting your floors, tables, clothes wet! Just take it all outside!


You do not need a fancy water table (although there are some great ones out there!) or a great amount of water. I've done these activities with a small basin of water, in sinks, or in little blow-up baby pools in the yard. You can do it with one child or a few, just watch, as always, for safety around water!

Here are my Top 5 Water Play activities:

1. Sink or Float: Gather up, with your child, a variety of objects that can get wet. They can be kitchen utensils, blocks, toys, fabric, sponges, .... anyything you have on hand! Your child can experiment with how these things interact with water ... Do they sink? Do they float? Do they expand and take on water? There are so many things your child can learn from this type of play, as well as having fun while doing it! Children will be observing, interacting, making connections - scientists at work!

2. Measure Up: Make available some containers - save yogurt, milk, margarine containers - and some measuring cups or small pitchers. Anything that will hold and pour water will do. Let your children discover how to fill containers using other containers and encourage them to see differences in size - "Look, it took you two scoops with the yogurt container to fill the margarine tub!" Watch as they count and size containers, determining smallest and largest, less and more, and be sure to name those concepts for them as you go! Join in to model new activities, as needed, but let them be the ones making the discoveries :)

3. Water Cycling: Children are never too little to learn about the importance of conservation. Talk to them about how the water we have on our planet is so important to our lives. Show them how the water cycle works by setting up a tiny model, using clear plastic containers. Next time it rains, catch some rain in a pitcher or shallow plastic container. Pour some into a clear cup and mark the water level on the outside with a piece of tape or marker. Next, invert another clear cup over the top to make a seal. Place it in a window where you can observe it over time. Check back later to see, as the water heats from the sun, tiny water droplets forming on the top and eventually dropping like rain back to the bottom. Keep checking to see if  the water level changes. After having some success with this, uncover the top and keep track of the water level, as it dries up. Lots of opportunity for discussion ... your child may want to record their findings via artwork, journal-style ... their first "lab reports"!!

4. Freeze and Melt: Fill up some ice trays or small containers with water and place in the freezer. When frozen, they can be turned out into a basin alone to observe the melting process, or put into water - where they will melt faster! Your child may want to use some big spoons to capture and release ice pieces, or just fingers to feel the temperature and texture. (Have a bit of room temperature water available to dip chilly fingers in.) Introduce some small toys and see what your child will do with them. Try freezing small figures in ice and seeing how long it takes to get them free! Your child may find ways to speed up the melting process! Fun!


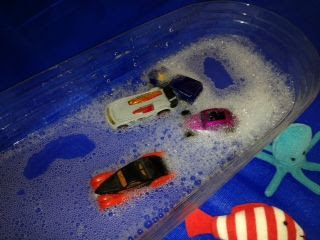
5. Wash Day!: Kids love water and kids love bubbles - and you love clean toys! Make everyone happy with wash day activities. Set up a basin with some warm, slightly soapy water - a little squirt of dish detergent goes a long way! Have a rinsing station - either a clear water basin to dunk in or some pitchers and a larger shallow container (like a baby pool) and a drying center. If you have access to a fence and clips, that would work, or spread out some beach towels or an old shower curtain to catch the sun. Then, let your kids have fun washing, soaping, rinsing and drying - cars, dolls, play equipment, etc. They will have a great time - of course, bubbles may be blown around, too, and they will most definitely get wet - and happy! 

Have fun!

Sunday, May 13, 2012

Paint Play!

Playing with paint can be so much fun - and filled with self-discovery!!! Sometimes little ones will have a hard time with art projects because their hands can't quite make what they want them to YET, so projects like this are perfect!!


Fill a pie plate or aluminum baking pan with just enough paint to cover the bottom. Have on hand a variety of materials that will either wash clean or are disposable. Lay out some big sheets of paper or a giant roll and let your kids explore! Let them know that there is no right or wrong way to CREATE - just dig in!!


They might have fun with some kitchen implements ... try a potato masher or a slotted spoon. Fly swatters make great prints, as do twists of fabric scraps. One of my personal favorites is bubble wrap!! The point is to let your kids explore and come up with new ways to use the materials.

Bubble Wrap Printing

You will be surprised at how cool the prints will be! Use multiple colors for layering and don't be afraid to let your little ones get messy - hands can make prints with palms, fingers or the outer edge of their fists ... Let them figure it out! If you're looking for a particular outcome, like a flower or a shape for a collage, to use in a card or illustration, you can cut it out after the paint dries. Have fun!

Wednesday, July 13, 2011

Summer Camp: Pirate Play!

Playing Pirates is always a BIG hit - with boys and girls! Gather some props to make a pretend pirate ship - a large box to decorate would be great, but just arranging some chairs together and tying on some black streamers or fabric to connect them will give your children a place to gather! Add a paper-plate ship's wheel  and they will be set to go!

Get in a bit of geography by having a globe on hand and spinning it to choose where you are setting sail for. Have the children find "home" on the globe as well! If there's no globe available, a large map will do :)

Every pirate needs a spyglass, so each child should start out with a paper towel tube and decorate accordingly - use markers or stickers to make them really cool! There are lots of clip-art pieces on Google images to try out - pick a few and assemble!

If you have any eyepatches lying around, or other pirate regalia, put them out in a dress-up bin - try some all-purpose vests turned inside out and some old shirts cut with ragged edges to make pirate gear! A sash cut from red and white striped fabric or an old scarf pulls the whole look together!


For more crafts, supply a key with simple mapping symbols and paper and markers for the children to make some maps - don't forget a big X to mark the spot where the treasure is!  If you're looking for more fine motor practice, you can find free pirate coloring sheets at several sites on the internet, as well!

Before all the fun begins, come up with a "treasure" to be split between the pirates - beaded necklaces from the party store and "gold" coins work well - and hide it all in a special container somewhere. Then, devise some clues that will guide the group from place to place, each time to find the next clue until the end of the hunt! Here are some to get you started:


Treasure Hunt!
Cut these clues apart and hide them as directed – or make up your own!


Under the fence where the squirrels run                        (have this ready to start the action!)
Look for clue #1!


Find a toy that’s the color blue – that’s                                   (hide this under a fence!)
Where you’ll find clue #2


Look around the base of the big tree                                       (hide this under or near a blue toy!)
If you’re looking for clue #3


Beside a window or a door,                                                  (hide at the base of a tree!)
You will find Clue #4


Look under a rock or two                                                     (hide beside a window or door)
To find the fifth and final clue!


This clue will send you around the lot                                         (hide under a rock)
Until you find where X marks the spot!

 (attach a rolled up REAL treasure map to the last clue -  ready to point out where you’ve hidden your “treasure"!)
 

If your treasure includes some gold coins, get in a little fun "arrrr"ithmetic - counting and adding up sums!

For snacks, try some "treasure" goldfish crackers in silver cupcake papers or some pretzel logs and fruit roll-ups cut up to form into a pirate ship - fun!

Books to read with your little pirates:
"Shiver Me Letters: A Pirate ABC" by June Sobel
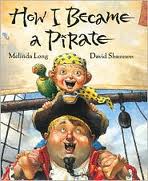
"How I Became A Pirate" by Melinda Long
"The Night Pirates" by Peter Harris
"Tough Boris" by Mem Fox
"Grandma and the Pirates" by Phoebe Gilman
"What's Inside a Pirate Ship"

Have a great time!

Thursday, July 7, 2011

Summer Camp: Pretend Camping!

When the summer starts to get "old" for your kids, here's a do-it-yourself fun idea: hold your own summer camp days, right at home!

All you need is a little pre-planning and some imagination - start now, while the fun is still fresh and plan ahead for later in the summer!

In the past, I've held camp during August (basically crafts, games, stories and snacks!) - parents and children were looking for things to do by that time of the summer! Plan a morning full of activities - you could even switch off with another parent or two to free up some me-time!! It's always more fun with a few:)

I'll start you off  with ideas for a theme that worked well for me - and follow up with more themes in more posts - so, check back!

Camp-In Day

Set up a small tent outdoors (or indoors!) and gather up some quilts and cushions. Make sure you have the fixings for a pretend camp-fire - I found a little aluminum baking pan that we adorned with yellow, orange and red tissue paper flames - some rocks or wooden blocks placed in a circle with some sticks in the middle would do nicely, too!


Meet around the "campfire" to get started - talk about camping and outdoor fun - then go on a little "hike" through your yard, neighborhood or a near-by park. Have a small plastic container along for a sensory tub to be filled with rocks, pinecones, leaves, small sticks, etc.

When you are finished, have a basket of books related to camping available :)  There is a Berenstain Bears book - "Go To Camp" and a great Kevin Henkes story "Bailey Goes Camping" to get you started! While some are checking out books, have the other children rotate through different activities, just like in school, so each child gets to try everything!

For crafts, have available some TP rolls to make into binoculars for viewing nature. Use paint or markers to color or have stickers available to decorate. At another spot, have some sturdy paper and glue to turn your nature finds into a cool art collage! Get a little letter/sound practice in by trying to label the found items! For pretend play, gather some plastic plates and picnic items and they will do the rest!

For a snack, try some trail mix (cereal mixed with raisins and nuts, if permitted) OR assemble your own kid-s'mores, using graham crackers with layers of chocolate cake frosting and marshmallow cream spread on top! Have water or juice available to stay hydrated!

Knowing how kids love "souvenirs," you could also find some tiny compasses and bandannas at a party store or on-line catalog! When you're ready, you can close the "camp" by singing some favorite songs around the fire! Have fun!

Friday, July 1, 2011

Summer Fun!

Surfing around the "blogosphere" is a great way to come up with some new ideas - and some motivation! When the summertime first begins, it's easy to forget about deadlines and timetables and just kick back ... but then, sometime down the road into summer, I always regret the time and opportunities missed for some learning fun!

This year, I decided to start a running list of fun things to do that would keep a child's skills active ... here's what I have so far: (and I "borrowed" extensively from other blogs, but didn't keep track :( - if one of these ideas is mentioned in your blog, or you have an idea to add, please add a link in comments with your URL! Thanks!)

1. Write the story of yourself ... with illustrations! Staple together some computer paper and make a cover - then fill in the pages with your OWN biography ... start with you as a baby and add in some of your big milestones - use photos or drawings and some labels or sentences (written or dictated!) - it will be a KEEPER!

2. Make some mail and send it - a card for a far-away cousin or someone having a special birthday! Draw, cut, glue - make it interesting! In fact, you could get some cards done now for future birthdays and set them aside for mailing later :)

3. Design a new project or toy - save your recycling for a few days and brainstorm what sort of art project you want to do - maybe you will use different objects to print-paint or use some craft glue to assemble something really awesome!

4. Make a summer dessert - ask a grown-up to help you measure, cut and mix things to make something tasty to eat! Dividing up some graham crackers and chocolate bars for S'mores could be math practice!! Work in some counting and some planning skills!

5. Read a book - with a friend! Find a buddy and get two copies of a book - try the library or trade with a neighbor - then read and get together to discuss. You could ask each other questions or just share your favorite part!

6. Make a map of your neighborhood - use some markers and pictures or magazine cut-outs and plan out the roads and buildings in your area ... use symbols, shapes, lines, etc. to make it cool!

7. Take a container and find all the loose change in your house - put it all together and then COUNT it all up - divide it into different coin piles, make patterns with the coins, towers of coins - and then figure out what to do with it all!

8. Make a collage of all things you LOVE - take some magazines and look through for foods, toys, colors, activites, etc. and take time cutting and gluing them all on a piece of paper or cardboard!

9. Read a book about something NEW - go to the library or bookstore and look for something you haven't read about - nature stories, space, people from sports or history or maybe a different culture - fiction or non-fiction!

10. Make your OWN list of fun things to do - check your newspaper and local websites - use your imagination and HAVE FUN!

Monday, May 16, 2011

Make Your Own Toys!

Play is about creating, imagining, sharing ... and anyone can do it! The ability to "invent" is one that is being pushed aside, as we find ourselves in toy aisles filled with every kind of already-made play props. There is a place for all these toys, but a need for imaginative approaches to play, as well :)

We have to make sure that Invention, Problem-Solving, Creating - all great skills we look for in adults - are encouraged when children are developing!! Open-ended projects, where materials are gathered and new things are made, are great for helping to develop these skills. Start with one project, where everything is created from materials you already have and see the wheels start to turn. You might have to model and vocalize the thought process for making playthings, but the fun will catch on!


Take a basket of recycling, including plastics, paper, cardboard and boxes, and see what interesting things kids can make! It might be a challenge at first, to use their imaginations ... some will have a hard time pretending the shredded paper that you might use in pretend play is "spaghetti" or that cardboard boxes could be made into other toys, but as their imaginations kick in, magic might happen!

We found a simple cardboard box, some margarine tops, some silver foil and bottle tops - and look what we came up with!! Use whatever you have on hand, and, if you don't permanently attach things, you can change it up again! Our little kitchen comes apart and can travel to Grandma's or go on vacation with you!

Use YOUR imagination and see what you can come up with - maybe you have a train scene to make or a pet park or another appliance for your pretend play area!

Have fun!

Friday, May 6, 2011

We Are Scientists: Float Your Boat!

Where I live, there are sidewalks and curbs lining the streets, making a great channel for water to float or race a boat on a particularly rainy day! If you have somewhere to float a boat, gather some materials together and make one! To make a "boat", all you need is a small piece of wood, like a piece left over from a house project or lightweight shims that you can find at a hardware store. If you don’t have access to wood, a container that is shallow with a flat bottom, such as a small tray from a frozen meal or a plastic bowl or lid would work fine! Look through your recyclables and get inspired :)
Whatever materials you decide to use, put together an “activity box,” including paint, stickers, foil, tape, cardboard and anything else you think might work! If you want to, include natural materials like small sticks or large leaves or pods for interest. Let the children create, going over some basic sink and float information while you “play!” (I needed some sandpaper to sand my wood a little, to avoid splinters! Then, markers or paint and a few stickers - and my boat was ready to try out!)

Have a larger shallow container ready with an inch or two of water to test the boats’ seaworthiness periodically! Sticky tape, such as the clear packing type, can seal areas that might not be otherwise waterproof – and, remember - sometimes, the simplest designs are the best at floating! (We found that a plastic lid from a food container made a great raft, like those in a water park - we imagined riding down the "river" in that!)

When you are ready, make sure there are no traffic hazards for your children, and get out in the rain! You might want to try to race boats made of different materials or try boats on different streets that have more or less incline (see if they go faster or slower!)  Brainstorm to come up with ideas that will prove/disprove different theories – scientists in the making!
Try adding some ballast to your boats and see what happens! We added plastic bags of coins and washers – maybe you have a favorite toy figure who would like to go for a ride?
Have fun!

Wednesday, April 6, 2011

Play and Learn with Plastic Easter Eggs!

Here you go - Ten Things To Do With Plastic Eggs!!
Before, during and after Easter, try these fun activities with plastic eggs you may have around the house! 
1.   Use for “anytime” egg hunts! Fill with seasonal stickers or pieces of a craft to be done - extend your hunt by having each child find one of each color, or plant personalized eggs  for each child to reinforce name recognition! If able, try one egg per letter and have them find and make their names :)

2.   Use eggs as a coin counting game! Put different amounts of coins in a few eggs and place in a basket on the counter. “Change” it up each time you play, pick an egg and get in some coin counting practice with your child while you’re waiting for dinner to finish cooking!

3.   Use eggs  to make patterns!  Open the eggs into halves so they will stand on open ends – use two or three colors to lay out in two- and three-part extended patterns – great practice :)


4.   Letter matching! Try matching upper to lower case – use a permanent marker to write uppercase letters on one half and lowercase on the other – mix up and then match up! Use multiples of colors to make it more challenging!

5.   Self-checking addition eggs!  Program each half on the outside with a number of dots, stars, etc. and write the sum on the inside (use one of each color to avoid mix-ups) – have your child count them up and then open up to check the answer!


6.   Use for games to make a rainy day fun! (Or a sunny one!) Place eggs on spoons and have some races ... if you drop one – no problem!


7.   Try another race – each child gets an egg and two or more children can race by pushing eggs with their noses on the floor – carefully!


8.   Like the old pass-the-orange game, tuck an egg under your chin and pass to a partner without dropping – this takes skill :)


9.   Use eggs in a container of sand for a dinosaur dig! Put small plastic dinosaurs in modeling clay and place in eggs. Bury in the sand and dig up “fossils”!


10. Use to plant seeds and grow small seedlings before planting outside! Open the eggs up, place in an egg tray or other container to stand them up, fill part way with dirt and add seeds … a little water and a sunny spot and you’ll be all set!

Have fun!

Sunday, March 27, 2011

April Showers ...

Get ready for April showers by checking out all the spring weather changes: wind, clouds and rainy days!

Wind
Wind projects are fun - kids love to play with kites, pinwheeels and flags - and there are lots of projects you can do with them at home. If you have an opportunity to fly a real kite, go for it! If not, a paper kite with a streamer for a tail and craft sticks in a "t," for support, is fun to make! If you trace the shape of a diamond on larger construction paper, give your child practice cutting it out to make the body of the kite. Decorate with markers, paint or stickers (or all three!) and then assemble the rest to form your kite!

To see which way the wind is blowing, make a "wind wand" - use a paper towel roll that you have decorated with stickers, markers or even colored tape. Attach one end of ten to twelve inch party streamers or lengths of tissue paper to one end, leaving the other end of the streamers free. Then take your wand outside and hold it in the wind, and watch the streamers fly!

Clouds
When you're ready to start checking out clouds, try Google-ing "cloud shapes" - all sorts of websites will pop up with fun pictures of cloud shapes - make sure to preview them first before showing to children. There are also some great books to read with your child: "It Looked Like Spilt Milk" by Charles G. Shaw, "The Little Cloud" by Eric Carle and "The Cloud Book" by Tomie de Paola are just a few! Take some time to view the clouds yourselves - see what cool things you can see in the clouds!

Make cloud pictures with white chalk or white paint on blue "sky" paper - then you can fill in the area with some nice, puffy cotton balls ... pull and stretch them to make them look different, like cloud types look different! Some might be thin and stringy, while others might be full and fluffy! Have children dictate a word for "My cloud looks like a _______," to finish it off.

Sing a cloud song with your child - this one follows the tune of "Frere Jacques" .....


Rain
Rain pictures are fun to do: using powder tempera paint on large paper, have your child make a design with the powder. (If you can't find powdered paint, just thin out some finger paint or bottled tempera paint so the rain can splatter it.) Carefully place pictures outside in a drizzle of rain on a tarp or plastic sheet and let the rain do the rest! When the design looks just right, bring them inside, again very carefully, and let dry - you will have a masterpiece!

To celebrate the rain, make a mobile with a cloud on top and some falling raindrops, with fun silver glitter to make the raindrops shine! Super easy project to do: All you need is white card stock or cardboard for the cloud, some varied lengths of yarn and blue paper raindrops. Use a little glue or a few swipes with a glue stick and your  silver glitter will look great on the raindrops! Tape or glue together and hang from a doorway or hanging fixture.

Play a counting game with some hand-made raindrops! Use the same paper as you used for the mobile, but cut a big "puddle" out of the blue and "raindrops" out of the white paper. Trace the shapes you want and have your child practice cutting on or close to the lines, if able. Lay the puddle on the ground and take turns dropping raindrops - some will land in the puddle, some outside the puddle. If you do this in pairs, one child can drop the raindrops while the other counts and then reverse. Count how many are in, how many are out and decide which is more/less/the same.

Have your child finish the sentence, "When it rains, I ______" and draw a picture to go with it! Maybe there are several endings to this sentence, and you will have a book! Take the opportunity to allow your child to point out or form some of the letters, if able.

Sing all the rain songs you know, "Rain, rain, go away, come again another day" and "It's raining, it's pouring, the old man is snoring ..." while noticing the rhyming words in the songs. Make up your own rhymes, too! When you use a familiar tune and make up new words, children usually find it easier to pick up.

Have fun!

Thursday, March 10, 2011

Playing With Paint!

When you think of painting, you usually picture a brush and some paper, but there are so many other ways to experiment with paint!
More recyclables!
If you want to explore shapes with your child, use some paper or plastic containers that have round or square openings – anything that you can use to make an impression on paper!  Pour some paint on a paper plate or disposable, washed food tray (such as from the store bakery) and let your child press the object in the paint (upside down or right side up!) and then press it on paper!
For circles, try margarine or yogurt containers, paper cups of all different sizes, even circular shaped cereal. (Referring back to the Olympic blog entry, you can make Olympic rings using the five colors & small paper cup rims! Hold the cup upside down, dip in paint and make circles galore!)
To print squares or rectangles, use take-out containers, microwavable food trays or cartons, or whatever you can find! Pasta or cracker boxes with the flaps ripped off could be just what you need to get started!
Sponge Fun!
You can purchase sponges in many shapes at dollar stores, craft stores, etc. – but, you can make them, too! Use a new, clean sponge and cut it into shapes … if you cut across the sponge and make a long, tall piece, little hands won’t get all “yucky”!

I like to make distinct shapes for seasonal projects - sometimes, kids DO want their paintings to look like something specific and sponging can give them this sense of accomplishment, even when their own hands can’t do it yet! BUT, I also like to just cut them in random shapes and see what the kids will make by combining shapes, adding on details with fingers or brushes (or Q-tips!) –  and let them CREATE!
Other objects …
Marble painting in a box – lay paper on the bottom of the box, dip the marble in paint and roll around, tilting the box in different directions!  Car painting – same concept, rolling little cars (hard/impossible to get all paint off!)  Painting with string – dipping string in paint and seeing what happens when you plop in down on the paper in random directions – fun! Use washable paints and make clean-up part of your activity – always!

Stamping with paint and different kitchen implements (think potato masher!) or cut vegetables and fruits can produce interesting results, as can leaves and small branches dipped in paint! Look for more on these in future blog entries :)
Have fun!