Sunday, February 27, 2011

Leprechaun Learning Time!

Top of the Morning! With St. Patrick's Day coming up, start thinking about all the fun you can have with Pots of Gold, Leprechauns, Rainbows, etc.

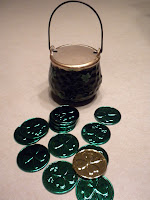
Pick up or create a "pot" of lucky coins - I have a dollar store set of green and gold coins, but you can use anything you want - real coins, paper coins, whatever you have handy! Use these for counting games and for  simple word problems ... "If I have 5 coins and I pay 4 for a toy, how many would I have left? If I have 2 coins, but I need five to get a cupcake, how many more do I need?" Even before children get the concept of coin values, they can simply count coins to get started.

Don't wait for written word problems to become "problems" for your children - get them used to the concept now by introducing them verbally. Then, turn the tables and have your child think up the problem next! This is great practice and using the coins gives them a visual, tactile aid to help them count. :)

Leprechauns might make visits to your home around St. Patrick's Day - watch out for furniture turned over or around, footprints and scattered lucky coins and shamrocks! Someone (with a Great Imagination) usually catches sight of an elf-like creature peeking in windows! Take turns removing an object from a room and having others guess what's missing - keeps them busy!!

You might want to make leprechaun-scopes to focus the search. Paper towel rolls covered with paper and decorated with coloring or stickers make a fun project for searching around - and maybe a game of I Spy!

For another art project, make rainbows with tissue paper and construction paper scraps - remember ROY G BIV (red, orange, yellow, green, blue, indigo, violet) - it's fun and helps reinforce color naming, small motor skills, and use of materials. A little gold glitter will look great and add interest spilling out of a U shaped pot of gold :) Try making a model and having your child try to copy it - shaping, sizing, and cutting are great skills!

Create Shamrocks by breaking them down into shapes - three hearts and a stem in a shamrock, four hearts in a four-leaf clover - find or make a heart shaped sponge or stamp and you can make tons of them! This works for other things, too - deconstructing objects into the shapes that make them up will help your child visualize things they want to draw!

Have fun!

Friday, February 25, 2011

Follow Directions - Please!

Help children learn to follow directions - having this skill aids in comfort and success in many different situations, including school. :)  We take it for granted, but sometimes they need a little help!

One-part directions ("Pick up that block, please") come first - AND make sure to model good manners at the same time! When the child is ready, introduce two-part ("Pick up the ball, then throw it to me, please") and then three-part directions to challenge them and keep them moving forward. Incorporating good manners, such as "please" and "thank you" into your daily give-and-take with children reinforces the use of these phrases - showing does SO much more than telling!

We know that using more than one of our senses helps us learn - sometimes a song helps, sometimes specific actions. Since children (and the rest of us!) can usually benefit from visual cues to stay on task, try using small cards with pictures on them for younger learners and words on them for the older ones. Along with giving directions verbally, display the pictures in the order to be done!


When the child is learning three-part directions, display three cards, showing a crayon, scissors and a glue stick, placed in order, to help them stay on task. "Color the picture, cut it out and glue it on the paper." First, children will use them to begin work and later, as a check for completing work. This type of system also may be used as needed in other situations, where difficulties in organizational areas are noted.

This would work with other tasks, too! To encourage self-esteem, motivation and self-reliance, work this into your daily routine. Whether it is for homework, daily scheduling or special jobs, make up cards and attach a magnetic strip on the back. Whatever the level of the "job", these cards can help your child stay on task, as well as keep you from having to repeat directions over and over.

Try it with tasks around the house - find pictures (or use pictures of your child) brushing teeth, picking up toys, reading a story, eating a snack, getting ready for bed, etc.  Then, use a magnetic surface (perhaps your refrigerator?) and set up your magnetic cards in the order of your child's routine. As each task is accomplished, your child can move the magnet to another spot or take it off and put it in a basket - whatever system works best for you!

Pretty soon, your child will have the routine down!

You can use a checklist idea to help your child learn in other formats, too. When you are getting ready to run some errands, make a paper list with your child of the places you have to visit. Arrange them in a numbered order and give your child the job of checking them off as you visit each place. Bank, Library, School, etc. - this will help your child look for beginning letters and to attach sounds to those letters, with your guidance ("Which word is Bank? ... it starts like /b/...").

This "game" also starts them on some organizing skills that will serve them well! Simple grocery lists work well, too! Having your child participate in daily outings and errands will keep them engaged and encourage conversations - with new opportunities for learning all around town!


Wednesday, February 23, 2011

I Love Eric Carle!

I LOVE Eric Carle's stories - his messages, style and illustrations are so comforting for children - and so interesting! There are lessons in every story, whether it is about colors, numbers, time, feelings ... all wrapped in beautiful language and outstanding collage pictures.

You are probably already familiar with some of Eric Carle's stories - "The Very Hungry Caterpillar", "The Mixed-Up Chameleon", "The Grounchy Ladybug", etc.  There is a link to his website at the bottom of my page for a complete list!

Doing an "author study" on Eric Carle with younger children is easy, fun and exciting - after reviewing his books and style, I am always amazed at how much they remember. See my blog entry "Get Into Books" for ideas of how to start your author study and make sure to spend time examining the illustrations!

After you have read and reread the books, examined the pictures and found some favorites, get ready to create! Eric Carle's style of illustration is fun for kids is try themselves ... and here's how:


First, prepare some paper ... using paint, crayons, construction paper, tissue paper ... whatever you have on hand! You will need to make your paper in different colors and patterns. Try blue paper with horizontal yellow lines and green paper with brown swirls on it - make all different colored backgrounds paired with many different patterns or designs! Eric Carle uses tissue paper and paint (there are directions on his site) but I have found that, when working with younger children, thicker paper holds up better for this. If you have a few children working on this, tear completed sheets in quarters and swap for lots of variety!

When your paper is all patterned, you can plan your shapes. Think about what you want to make and then decide what shapes you might need to make that object. For example, an animal - a horse! You will need a body, a neck, head and legs, as well as any decorative parts. This is a great opportunity to go over shapes and even to use stencils or tracing materials to practice with. Freehand, of course, is a great option, too! You can either cut or tear your paper into the shapes you need and then assemble them on paper.


I made a teddy bear using many different circles and a house with some squares and triangles ... what will you make?

So .... this is how Eric Carle makes his illustrations - and now you can too!

The most important thing is to use your creativity - everyone has some! And have fun!

Sunday, February 20, 2011

Make Your Own Teaching Tools!

You can stock up on some great teaching tools with a quick trip to the hardware store! There are some inexpensive things that you can pick up (or may have at home as the result of a home improvement project!) that are fun alternatives to pre-made games.

First, sandpaper! Sandpaper (rough surface, not superfine) can be used to make tactile letters for your children when they are first learning the shapes of letters. Cut out block letters for them to trace with their fingers and then lay under a sheet of computer paper to make letter "rubbings." Fix the paper so it won't move around ( a little masking tape is great!) and then use the side of a crayon with the paper peeled off to make the shape of the letter magically appear!

Another thing to do with the sandpaper is to make long and short bars, as well as large and small curves to assemble together to make the letters of the alphabet - sort of a puzzle! Two longs and a short make upper-case "A", etc. The rough texture and the stiffness of the paper help children to focus on these shapes and give it interest. Keep them in a small plastic container to use over and over!

Sandpaper is also fun to throw into your art supply box - bits of sandpaper can become the beach, rocks, mountains, etc. in future collage pictures.

PVC pipe pieces are also fun for the kids! I have a "telephone" that I use often that is made out of two curved ends with another straight piece (which you can't see) that holds them together. This device is also "magical" - it amplifies the voice and sends it right up to the speaker's ear, which can be great for trying to master sounds. Give your child a small mirror and they can talk out loud and both hear the sound and see themselves make the sound - if they need to work on specific sounds, they can play this "game" to see and hear themselves getting clearer!

There are many things that can be built out of plastic pieces - puppet theatres, forts, store fronts, etc. Use your imagination!

Get your child a yardstick and they will measure EVERYTHING in your house - use it for counting practice and they will begin to associate the number with the numerals they can see. The little papers with paint colors come in handy for rainbow making and collaging or card making - pick up a few here and there and throw them in your art box for a rainy day! Start looking at things with a new eye - opportunities are everywhere for recycling materials and finding new uses for everyday things!

Last but not least - before you throw out your junk mail, check for coupon pages or large ads that can be used for cutting practice. Your child can get practice cutting on lines by going through these pages before they hit the recycling bucket!  Enjoy!

Friday, February 18, 2011

Celebrate President's Day

President's Day is an opportunity to explore the bigger world that we live in! Your child's world is, first and foremost, your own family, your neighborhood, and your town or city. While it is so important for children to feel safe and comfortable in their world, it's great to eventually see themselves as part of a larger world, too.

Use this opportunity to have children become familiar with some of the symbols of our country, such as our Flag, The White House, and historical figures, in very basic terms that they can relate to. "A long time ago, even before Grandma was a little girl, there were people who decided to start a new country. They made up some rules that they thought were important and voted on how to make our country a good place to live."  Your child may have their own ideas of what a good country would be like - record their words on paper and have them illustrate it! "If I were President, I would ..."  or "Our country is great because, ...
Bookmaking through dictation is always a great project to do with your child!

You can find lots of pictures and information out there - check the internet and the library - and try out http://www.whitehouse.gov/ for current photos and lots of info.


Have your child color an American Flag, or use small pieces of tissue paper to ball up and glue in red and white stripes. This pattern came from http://www.familycrafts.about.com/, which has lots of images and information. Talk about the symbols in the flag - the 13 stripes for the first 13 "places to live" and 50 stars for the 50 we have now - since we've grown! Finish it off with star stickers or coloring the blue field behind the white stars. If you attach it to a drinking straw or a wooden craft stick, you'll have a flag for waving or displaying.

Another project for President's Day is to make a silhouette of your child, similiar to the silhouettes of Presidents Washington and Lincoln that are so recognizable. You will need a spot on the wall or refrigerator where you can tack up some paper and, using a bright light without a shade, project their likeness onto it. Trace with a white crayon or chalk on black paper or any color you want on white paper. Pairing your child's likeness with a quote from their dictation will give you a sweet keepsake to show them when they're older!


Wednesday, February 16, 2011

Get Into Books!

Reading stories together is a wonderful way to spend time with your child – stories open up doors into new worlds, increase vocabulary and reading together is a great sharing time. So, take it a step further! Young children can learn many things from exploring authors more in-depth - and, teachers and parents can pick up a thing or two as well! Besides reading just for enjoyment, which is wonderful, there are many components of early literacy to explore, such as rhyming words, repeating lines and parts of a story. There are also varied methods of illustration to discover.

Here's the plan: Pick out a favorite author to explore - one that your child is already familiar with would work well - and assemble a group of books from the public library, your own library, or borrow from friends.

Over the course of a few days, take a "picture walk" through each book, browse the books (thumb through without too many details), and read each book more than once. Give your child the job of "noticing." "Noticing" will get them involved in the book (book “detectives”) and encourage them to look for rhymes, characters, illustration techniques, and repeating sounds or words. “I heard something that rhymes with “blue” – did you hear it?” or “I keep hearing the same word in this story … what do think it is?”

Ask your child to find the name of the main character, which will be repeated in the book, and see what letters are in the character’s name. Notice what things are the same about the author’s books – and what are different! “Eric Carle seems to have a lot of animals in his books – let’s check them all and see!” or “’The Cat in The Hat’ has a lot of rhyming words – let’s see if the other Dr. Seuss books do, too!”

Look for similarities in the illustrations that carry over from book to book with different authors and illustrators. Dr. Seuss books have a very particular style of illustration and are fun to look at! Eric Carle books have a paper collage style that is easily identified, while Margaret Wise Brown’s books, “Goodnight Moon” and “The Runaway Bunny” have some shared illustration that good noticing will pick up!

Check out author websites and look for extension activities – there are often coloring sheets, puppet outlines, project ideas, etc. on these sites! I have links to a few at the bottom of my blog page. Extend the book with conversation as well – discuss your favorite part of the story or your favorite character, modeling for your child a deeper interest in what is going on between the covers of the book. Open up the world of reading – and writing – for them, by asking what they would change or do next in the book! Spend time … and have fun!

Monday, February 14, 2011

Space is the Place!

Space is a fun topic to explore with your kids - and, right now, it's very current with the space shuttle launches going on!

I like to read a variety of books with my kids - both fiction and non-fiction - and do all kinds of projects to get immersed in the subject! There are Curious George books and other books on space by H. A. Rey, Usborne books, even books with Dora and Cat-in-the-Hat. Visit the library or a bookstore and you can search by the subject - if you're not familiar with the process, there are people there to help you get started. If you have access to a computer at home, search for books about space and put in the grade level to narrow it down. I like "Me and My Place in Space" by Joan Sweeney - it's a great conversation starter! Read the books, talk about the books and have your child "read" to you by describing what is happening in the pictures. Each opportunity you and your child have to explore new worlds will increase vocabulary and knowledge - you'll be surprised at the connections they make!

When you have sparked some interest in the subject, you can move on to some great recyclable crafts! Paper towel tubes make great rocket ships, with a little imagination ... and some stickers, markers, paint, etc. Making sure there is a little round window for your child's picture to peek out of will make this a treasured toy!

A big favorite with my classes in the past has been assembling their very own control panels to use for imaginary flights in space! Take a piece of black posterboard or a piece of cardboard (about the size of a piece of computer paper - or any size, really!) and cover it or accent it with aluminum foil. Look for a picture of the earth ( I checked Google images) and some other graphics that you can either cut out, copy, color or print.


Save some drink container tops from apple juice or gatorade that are varied colors to attach as "control" buttons. I've also used colored stickers and buttons from my button collection on past panels. The little looseleaf hole protectors are easy to find at drug stores or stationery stores and make cool additions. Assemble all this in any fashion you wish and model playing with your child - they will enjoy counting down from 10 and blasting off on many adventures!


10-9-8-7-6-5-4-3-2-1-Blast off! Have a good trip!!

Friday, February 11, 2011

Encourage the Artist Within!

Give your children opportunities to express themselves artistically - even before they are able to make something that is identifiable! A friend of mine has a beautiful piece of art, hanging in her home, matted and framed, that is colorful and modern-art looking - and done by her then-three-year-old. A creative mix of colors or textures, when matted out in basic black or a color of your choice can be a thing of beauty!

I like to introduce children to art one medium at a time - and let them fully experience it: what it feels like, looks like, what they can make it do ... with some very cool results!

Crayons are usually one of the first art tools that a child comes in contact with - they will make "scribble" pictures, loops, dashes, color one color on top of another ... all methods of experimenting with the medium. And ... all good small motor activities, pre-writing practice, color mixing. Use your child's art to build instruction - ask them what they see, what they want this to say (because some of that "scribble" is "writing"!), what colors they see ... open-ended questions that will encourage language development as well! Just because you don't see a picture of a person or a truck doesn't mean that the picture has no value - it is just the beginning of the process that will lead, eventually, to more recognizable shapes and objects.

Pastels, paints, watercolors, etc. - all introduced one at a time - will help your child in developing so many different skills, especially if the human interaction is there also! Some children revel in the feeling of paint on their fingers, others have an aversion to mess - keep some baby wipes close by! Use things like q-tips or cotton balls to paint with (you can then throw away!) or cut vegetables to stamp with (potatoes work great!). If you want to work with sponges, you can get pre-cut or cut your own and, if they're too messy, use clothes-pins to hold the edges of sponges.

A gallery of clothespins with magnet strips will hold art on your fridge until you need the space for the next batch.  You can get creative with your art holders, too - attach fun foam initials or wooden crafts to the other side of the clothespin! And, if you don't want to keep every single item, start a digital "gallery" on your computer - takes up way less space!


Artwork is something every child can do - start early and encourage experimenting - and take the opportunity to converse with and compliment your child ... self-esteem is so key to development - and, most of all, have fun!

Wednesday, February 9, 2011

Valentine Gifts From the Heart

For someone special for Valentine’s Day, involve your child in a craft to make the holiday extra-special! The little ones always make a hit with hand-print art – if you position two hand prints on a page so the heel of the hands are on top of each other and the fingers of each hand are together but pointed  up and out (in the direction of 2:00 and 10:00 on a clock!), you will have a heart shape! Use washable paint on paper and let dry before “signing” and cutting paper to define the heart even better.
If you want something more permanent, do the same formation but use a plain white 4” square tile (hardware stores usually sell these stock items by the case or singly) and craft paint. Practice on paper first, so you fine-tune the amount of paint, etc.  When dry, “sign” or decorate with a permanent marker, and seal with a coat or two of Mod-Podge (craft store) – it will initially look glazed but will dry clear. I like to glue a square or some strips of felt on the bottom, to avoid scratching any surfaces. (Don’t use washable paint – the mod-podge will smear it when applied – just wash up right away and no paint will stick.)

If your child is a little older, you can choose a craft that will sharpen those small motor skills, as well as reinforce math skills.  You will need chenille sticks (pipe cleaners) and some plastic pony beads – you can use Valentine colors or whatever you choose – and a bit of ribbon (all available at craft stores or in the craft aisle of a bigger discount store). Have your child string beads, in a pattern or in groups of colors or whatever you choose, and leave room at each end for twisting together to close. Shape into a heart and bend the twisted ends into the center of the heart. Finish with another bead or two, secure and tie a loop of ribbon on for hanging on a doorknob, cabinet pull or wherever you choose. Use your leftover supplies to make a bead kit, for use in sorting, counting, sequencing and patterning exercises. You can use them over and over – have fun!

Monday, February 7, 2011

Give That Child A Job!

Giving young children responsibilities around the house is a win/win situation! It is important for children to learn how to undertake, complete and take pride in performing tasks, even though they may be very small. Simple things such as picking up toys, setting places at the table and helping Mom or Dad carry things can make them feel accomplished and build self-esteem. With just a little imagination, they can also be learning experiences!

If you have a toy storage system, such as separate bins for building toys, action figures, toy animals – then, you can use clean-up time as a sorting lesson. Your child will have to decide where each item belongs, sort them out and use small and gross motor skills to clean up the toys, and ... you will get a cleaner play space! Labeling your bins with small pictures of what belongs in each bin will help your child determine where to place the toys. This lesson, if made into a regular practice, will help develop these life skills – and it’s much easier to start with a young child than with a teen-ager!
Helping around the house with a list of chores or simple tasks can be great practice at following directions – “Could you please bring that bag over here?” or “Please hang your coat up on the hook.” – and will give your child great practice at a task they will need to develop for success in school.
Even setting the table can be a math lesson – “four plates, one, two, three, four … four spoons ….” Repetitive counting is an early skill, but don’t stop there!  “If” questions help your child in acquiring reasoning skills – “If Grandma came to dinner, how many plates would we need?” or “If Mom is not eating at home tonight, how many forks will we need?” These simple questions encourage your child’s math skills’ development – and it’s never too young to start!
While it’s not necessary to tangibly reward your child for contributing as a member of the family, specific praise is always GREAT – “Thank you for picking that toy up – you put it back exactly where it belongs!” Specific praise tells your child what they have done and enables them to learn from each experience.
Singing or playing games while doing a clean-up or set-up job will also add a little fun to the job – I have my classes sing a favorite song while working –  the ABC song is a great length for a quick clean-up. You can mix it up with a count-down or have each child pick up ten things (or more!) – whatever works for you!  Have fun with it!

Friday, February 4, 2011

Make Letters From Anything!

When your child shows an interest in making letters, shapes and numbers, keep in mind that they may not have the small motor coordination to make the letters yet using pencils or crayons. This doesn't mean that they aren't ready to start forming the letters in different ways, though!

Try this - give your child a small plate that is brightly colored (plastic Solo plates work great!). Pour a little bit of salt on the plate - just enough to cover the plate lightly. Model a shape or a letter for your child and then give the plate a tiny shake to "erase" what you made. Encourage your child to try to make something and practice the erasing process. This will keep them entertained for a while - mix it up with numbers, pictures, etc. One mom I know does this with dry Jell-O mix, another has her child lay on the plush carpet and "draw" designs with her fingers in the carpet. Any time you introduce another way of doing something, it ups the interest factor.

Using straight shapes like popsicle sticks and wavy shapes like yarn or string to form letters is another example that kids have fun with - add a little glue and some construction paper if you want to make it permanent.

Something as simple as changing the media you are using may help entice your child into spending more time exercising those muscles that they need to develop. Markers, for instance, are easier to push across paper, playdoh is a great way to exercise the fingers and even Legos and other building toys encourage the use of the same small motor skills necessary for writing correctly later on. Use YOUR imagination and see what you come up with!

Wednesday, February 2, 2011

LOVE those Valentine crafts!

With Valentine's Day right around the corner, it's time to get busy with some from-the-heart cards and crafts. Take a plastic shoebox or an empty basket and start filling it with things you have around the house - old greeting cards, bits of ribbon, lace, construction paper ... and then pick up some heart stickers, doilies and such when you're out at a drugstore or food shopping. Rubber stamps are another fun thing to have on hand. Add some colored pencils or markers and some glue or tape, and you're all set for some good old-fashioned valentines. Making their own Valentines will give your child a chance to exercise all sorts of developmental skills - small motor, visual discrimination, patterns, colors, etc. My favorite kid crafts are always the ones that are very obviously constructed by them! Have your child sign their name or personalize with a thumbprint!

Handprints or traced hands also give a special touch to a Valentine greeting ... so, here's one that is a sure hit! If you have a roll of drawing paper, have your child stretch out their arms and measure the paper out to his/her arm span (if you don't, you can attach lengths of paper together or look for "sentence strips" at an office supply store). Make the strip about 5 or 6 inches wide. Now, trace your child's hands on colorful paper and attach to either end of the paper strip. Write something like "Here's a hug for you!" or "I love you THIS MUCH!" on the strip. Have your child decorate the whole thing with whatever you want and roll up like a scroll - and you have a Valentine's HUG to give away to someone special!  (Maybe you'll get one, too!)